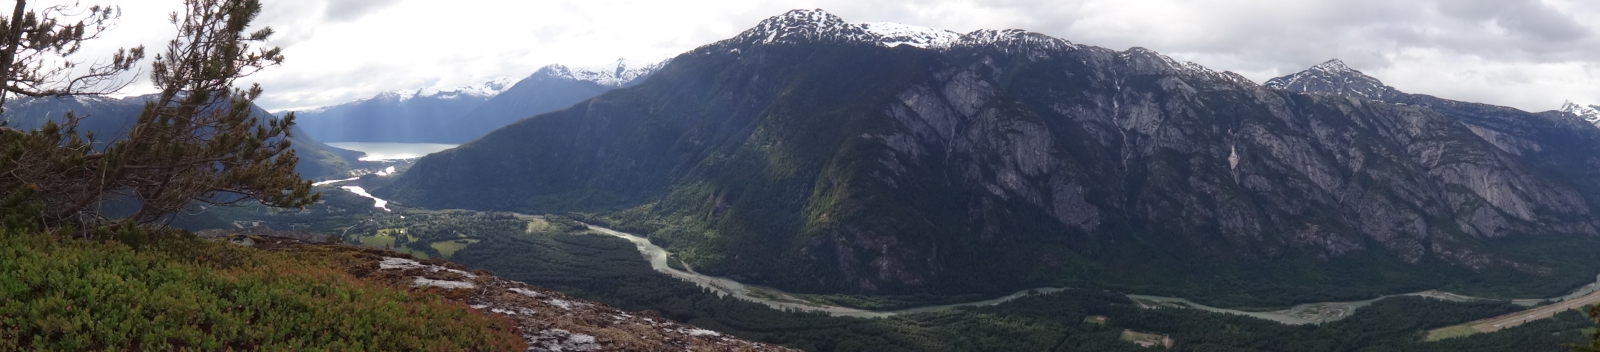
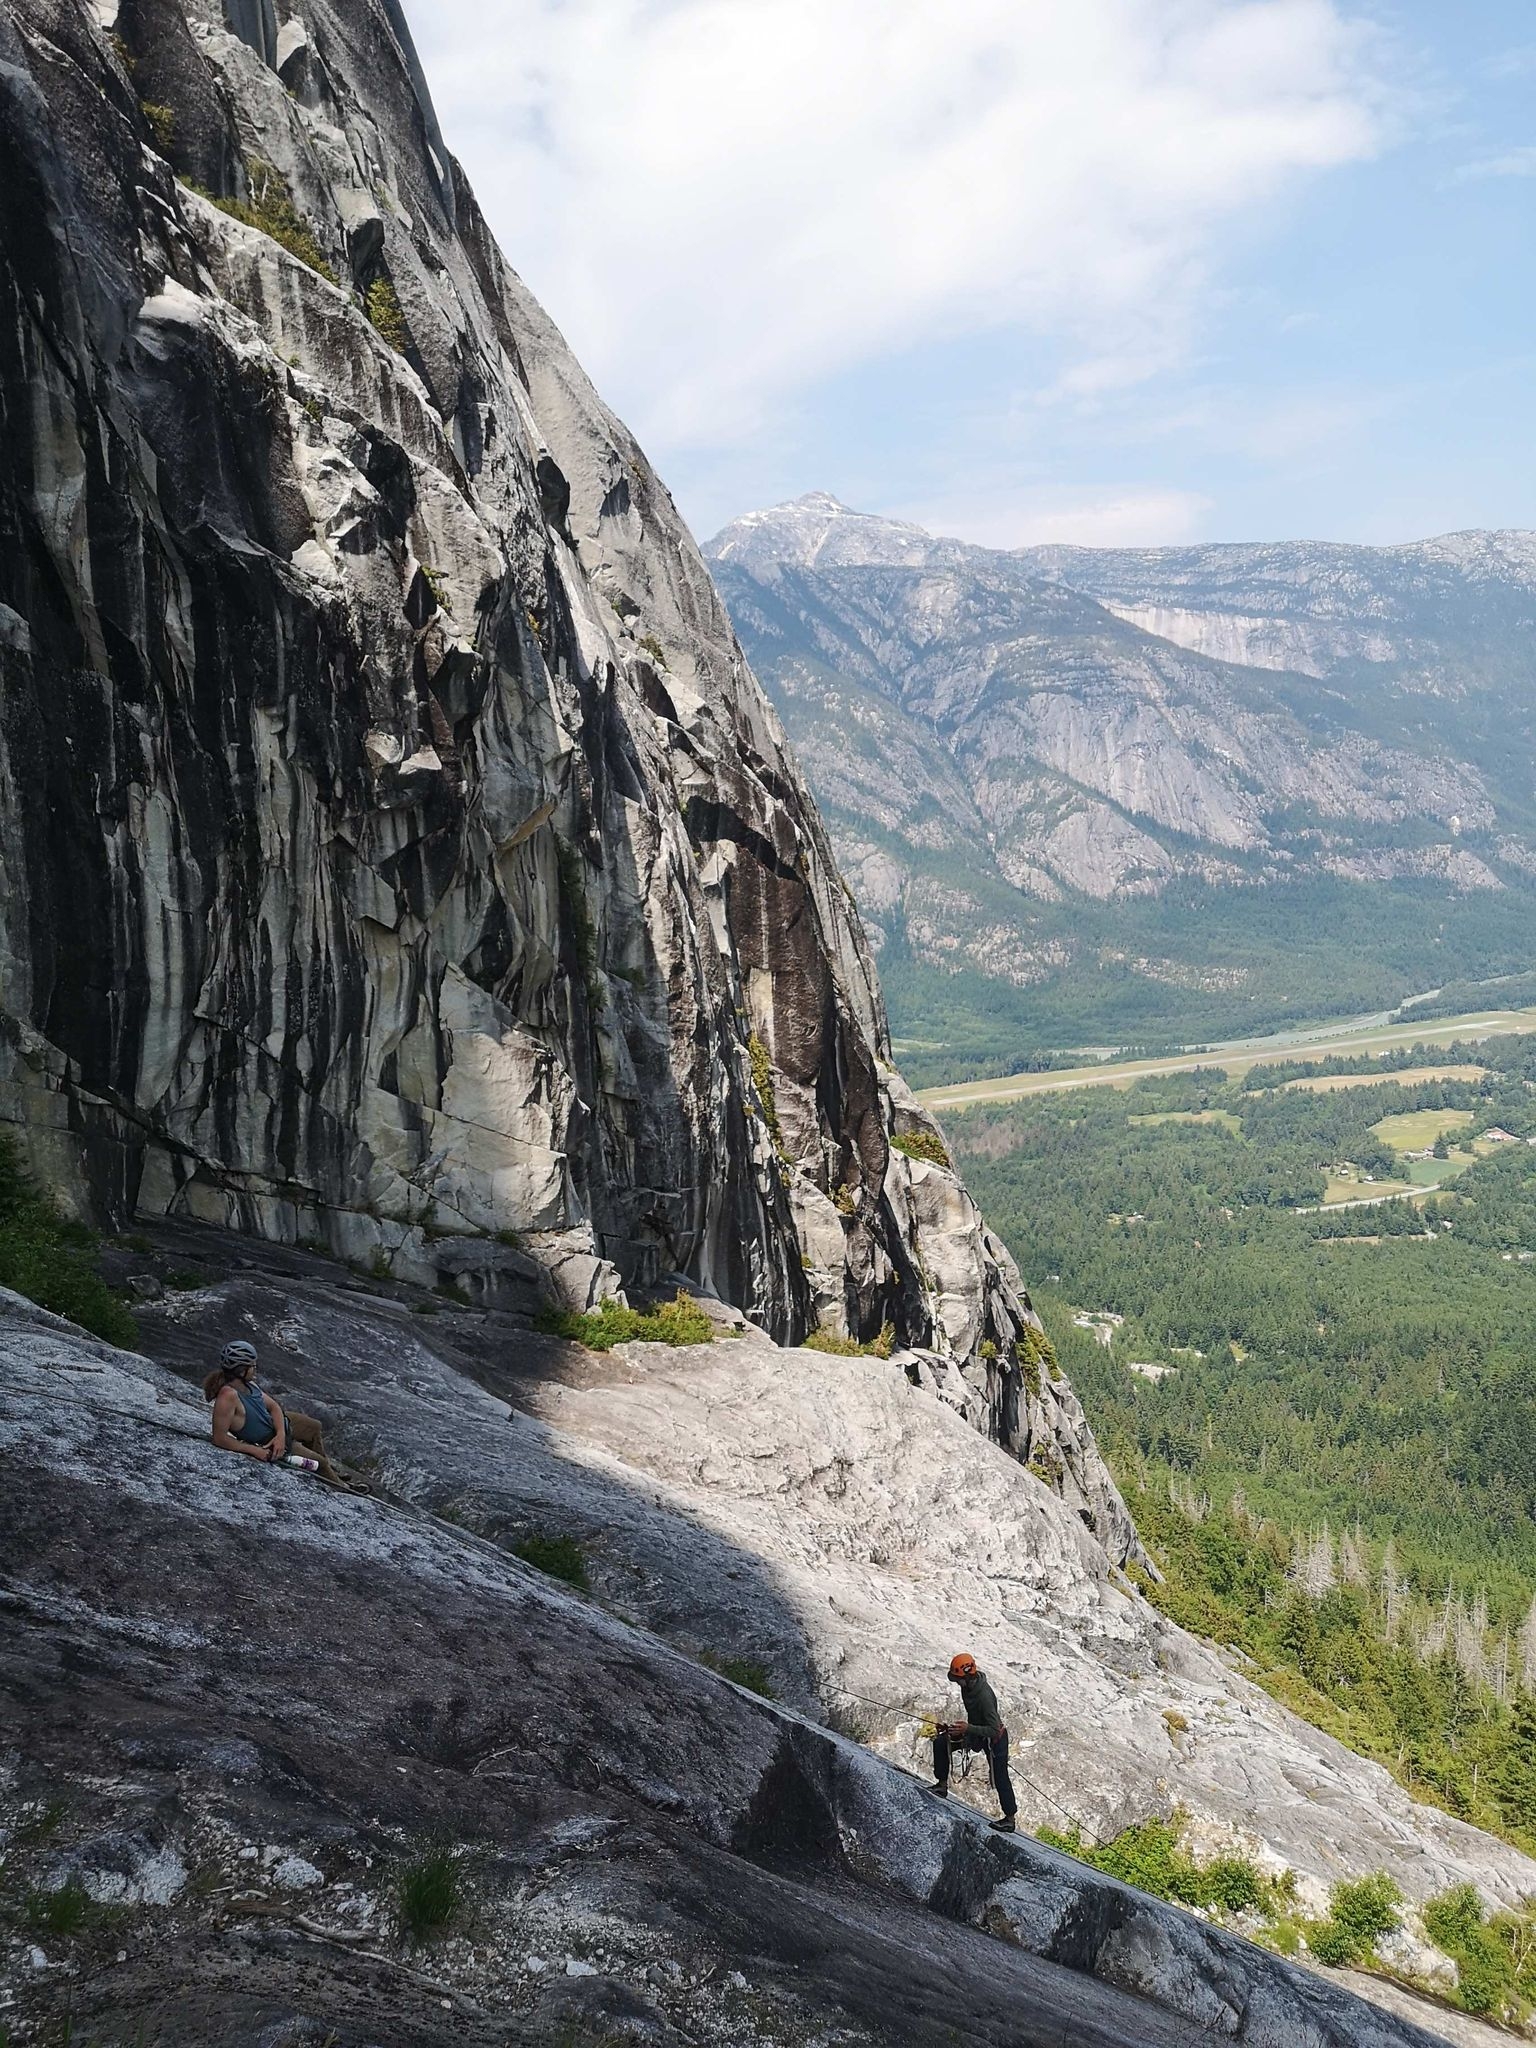
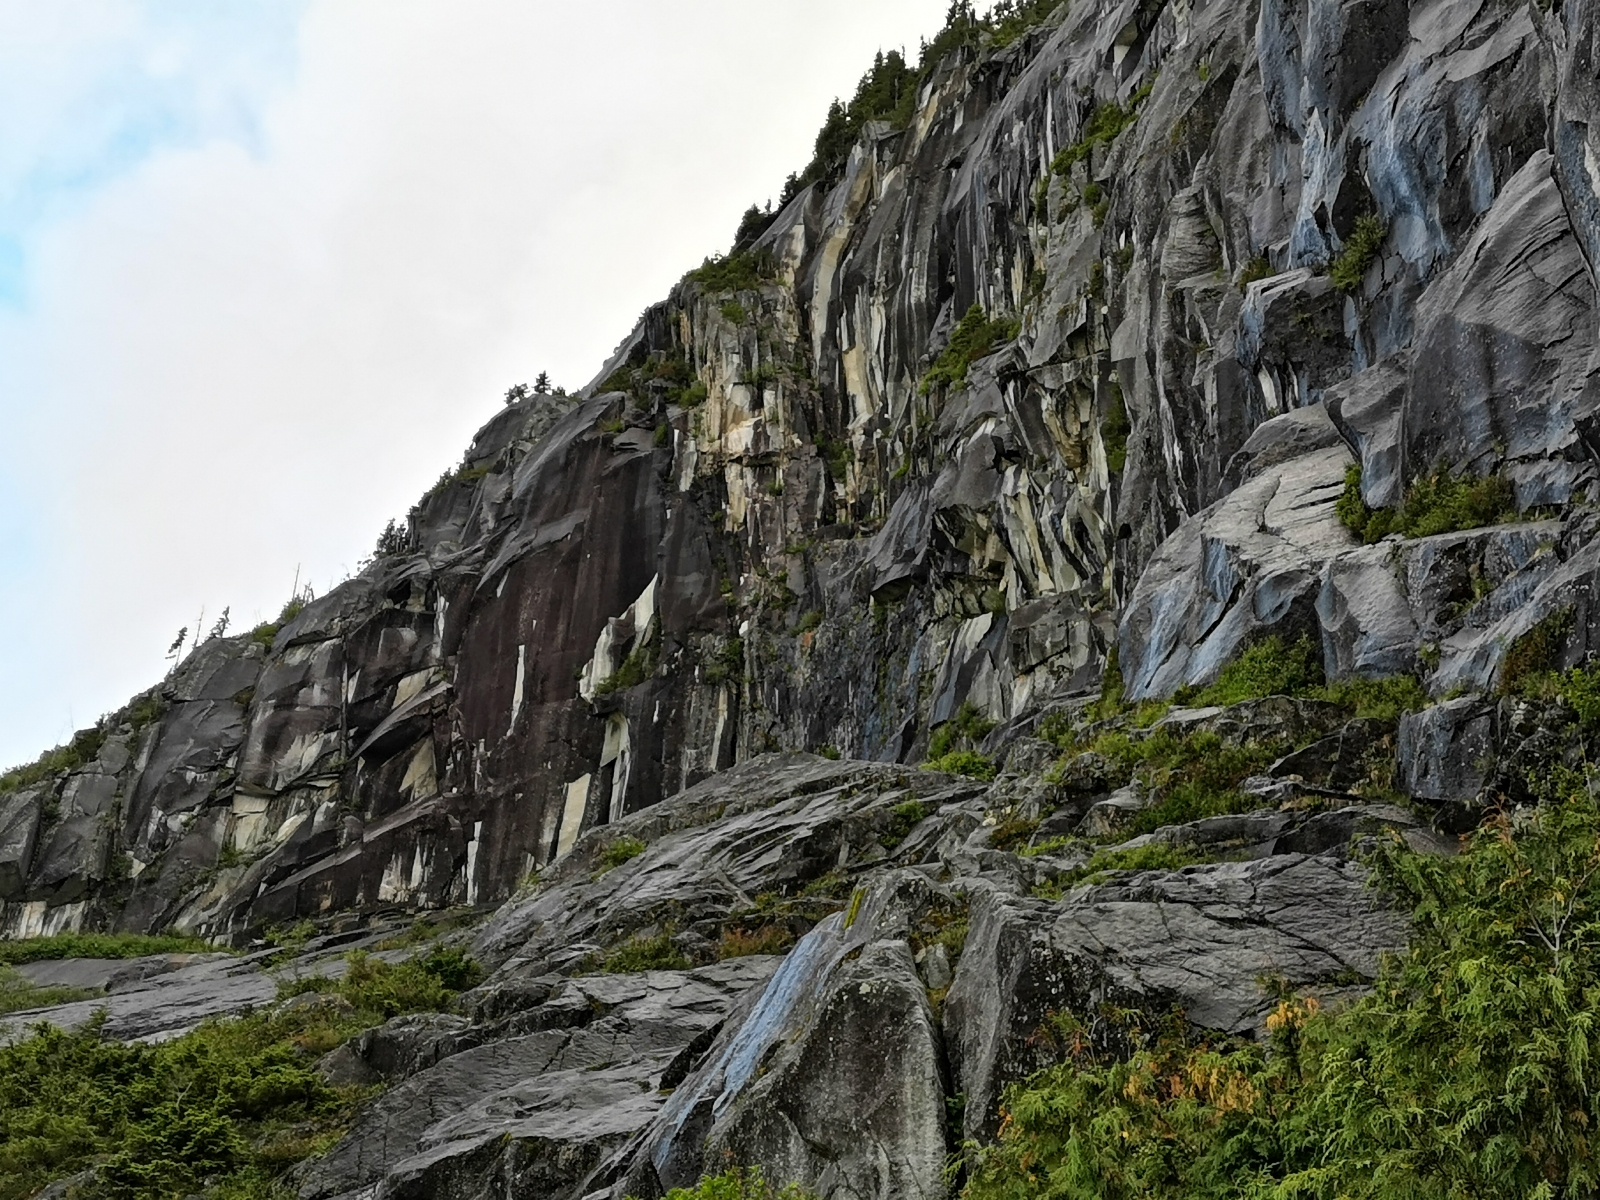
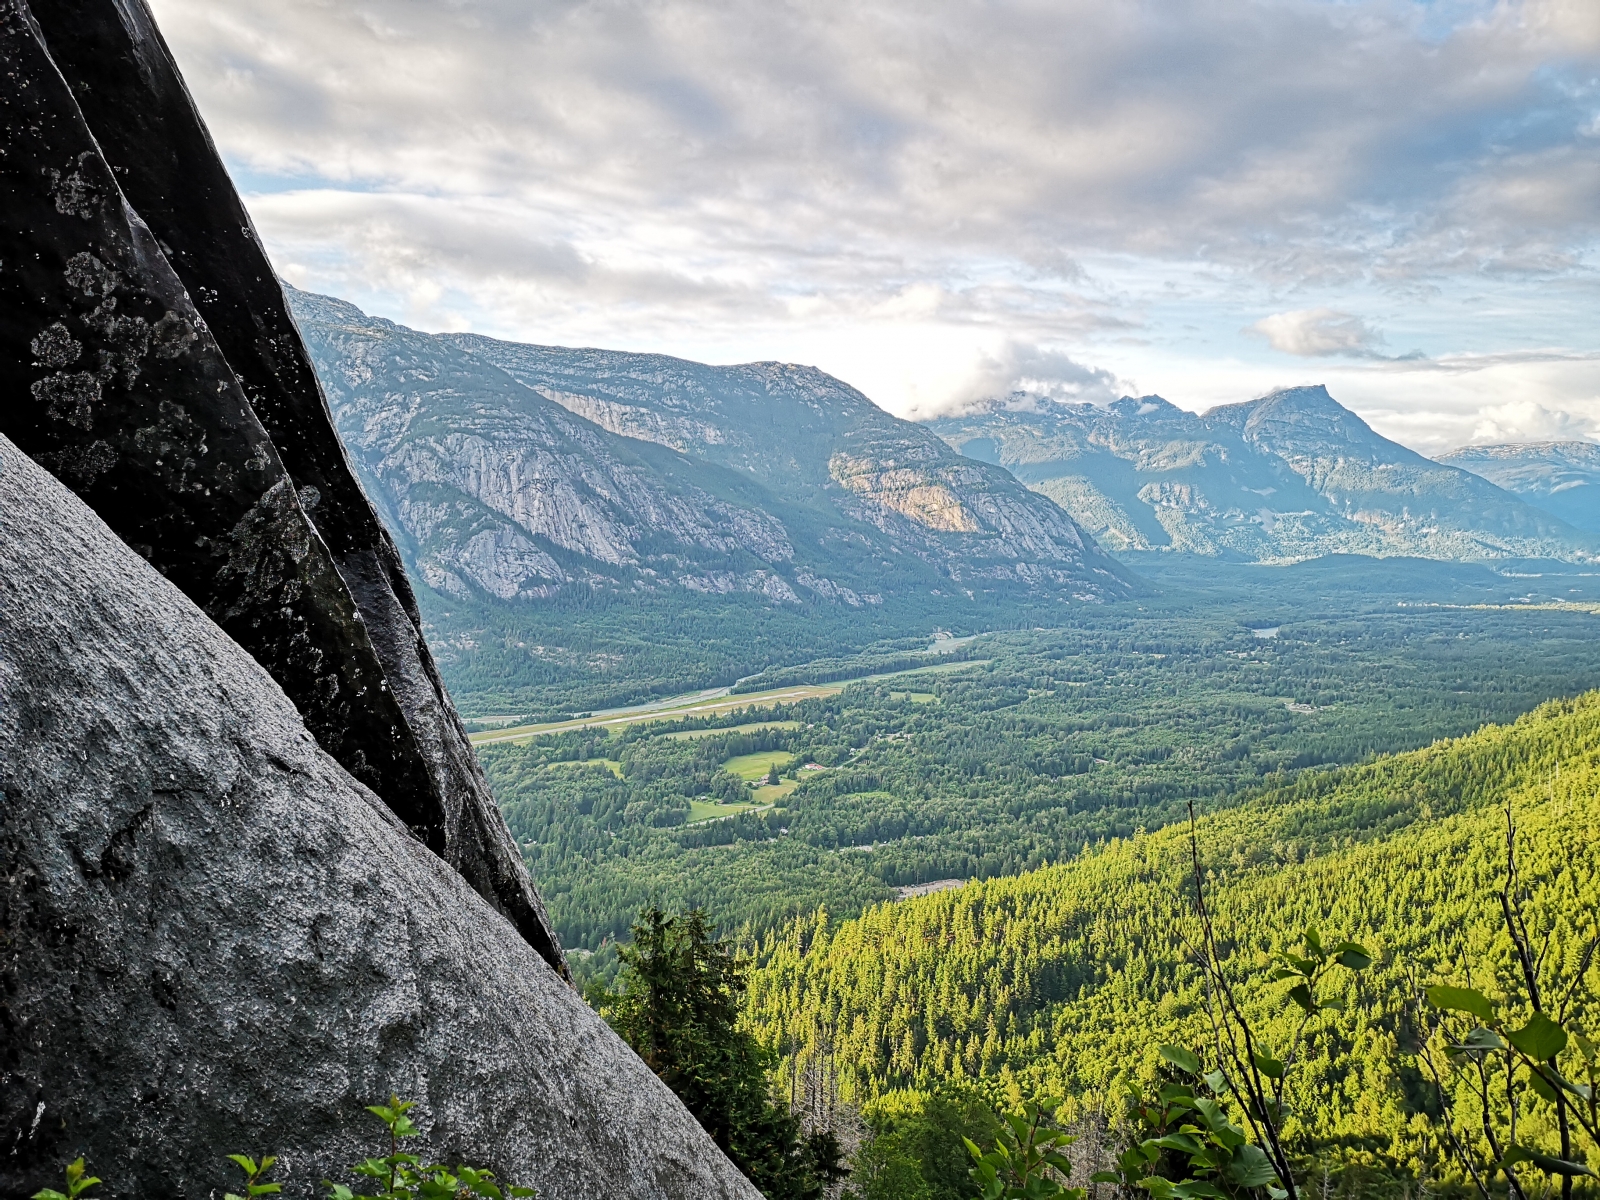
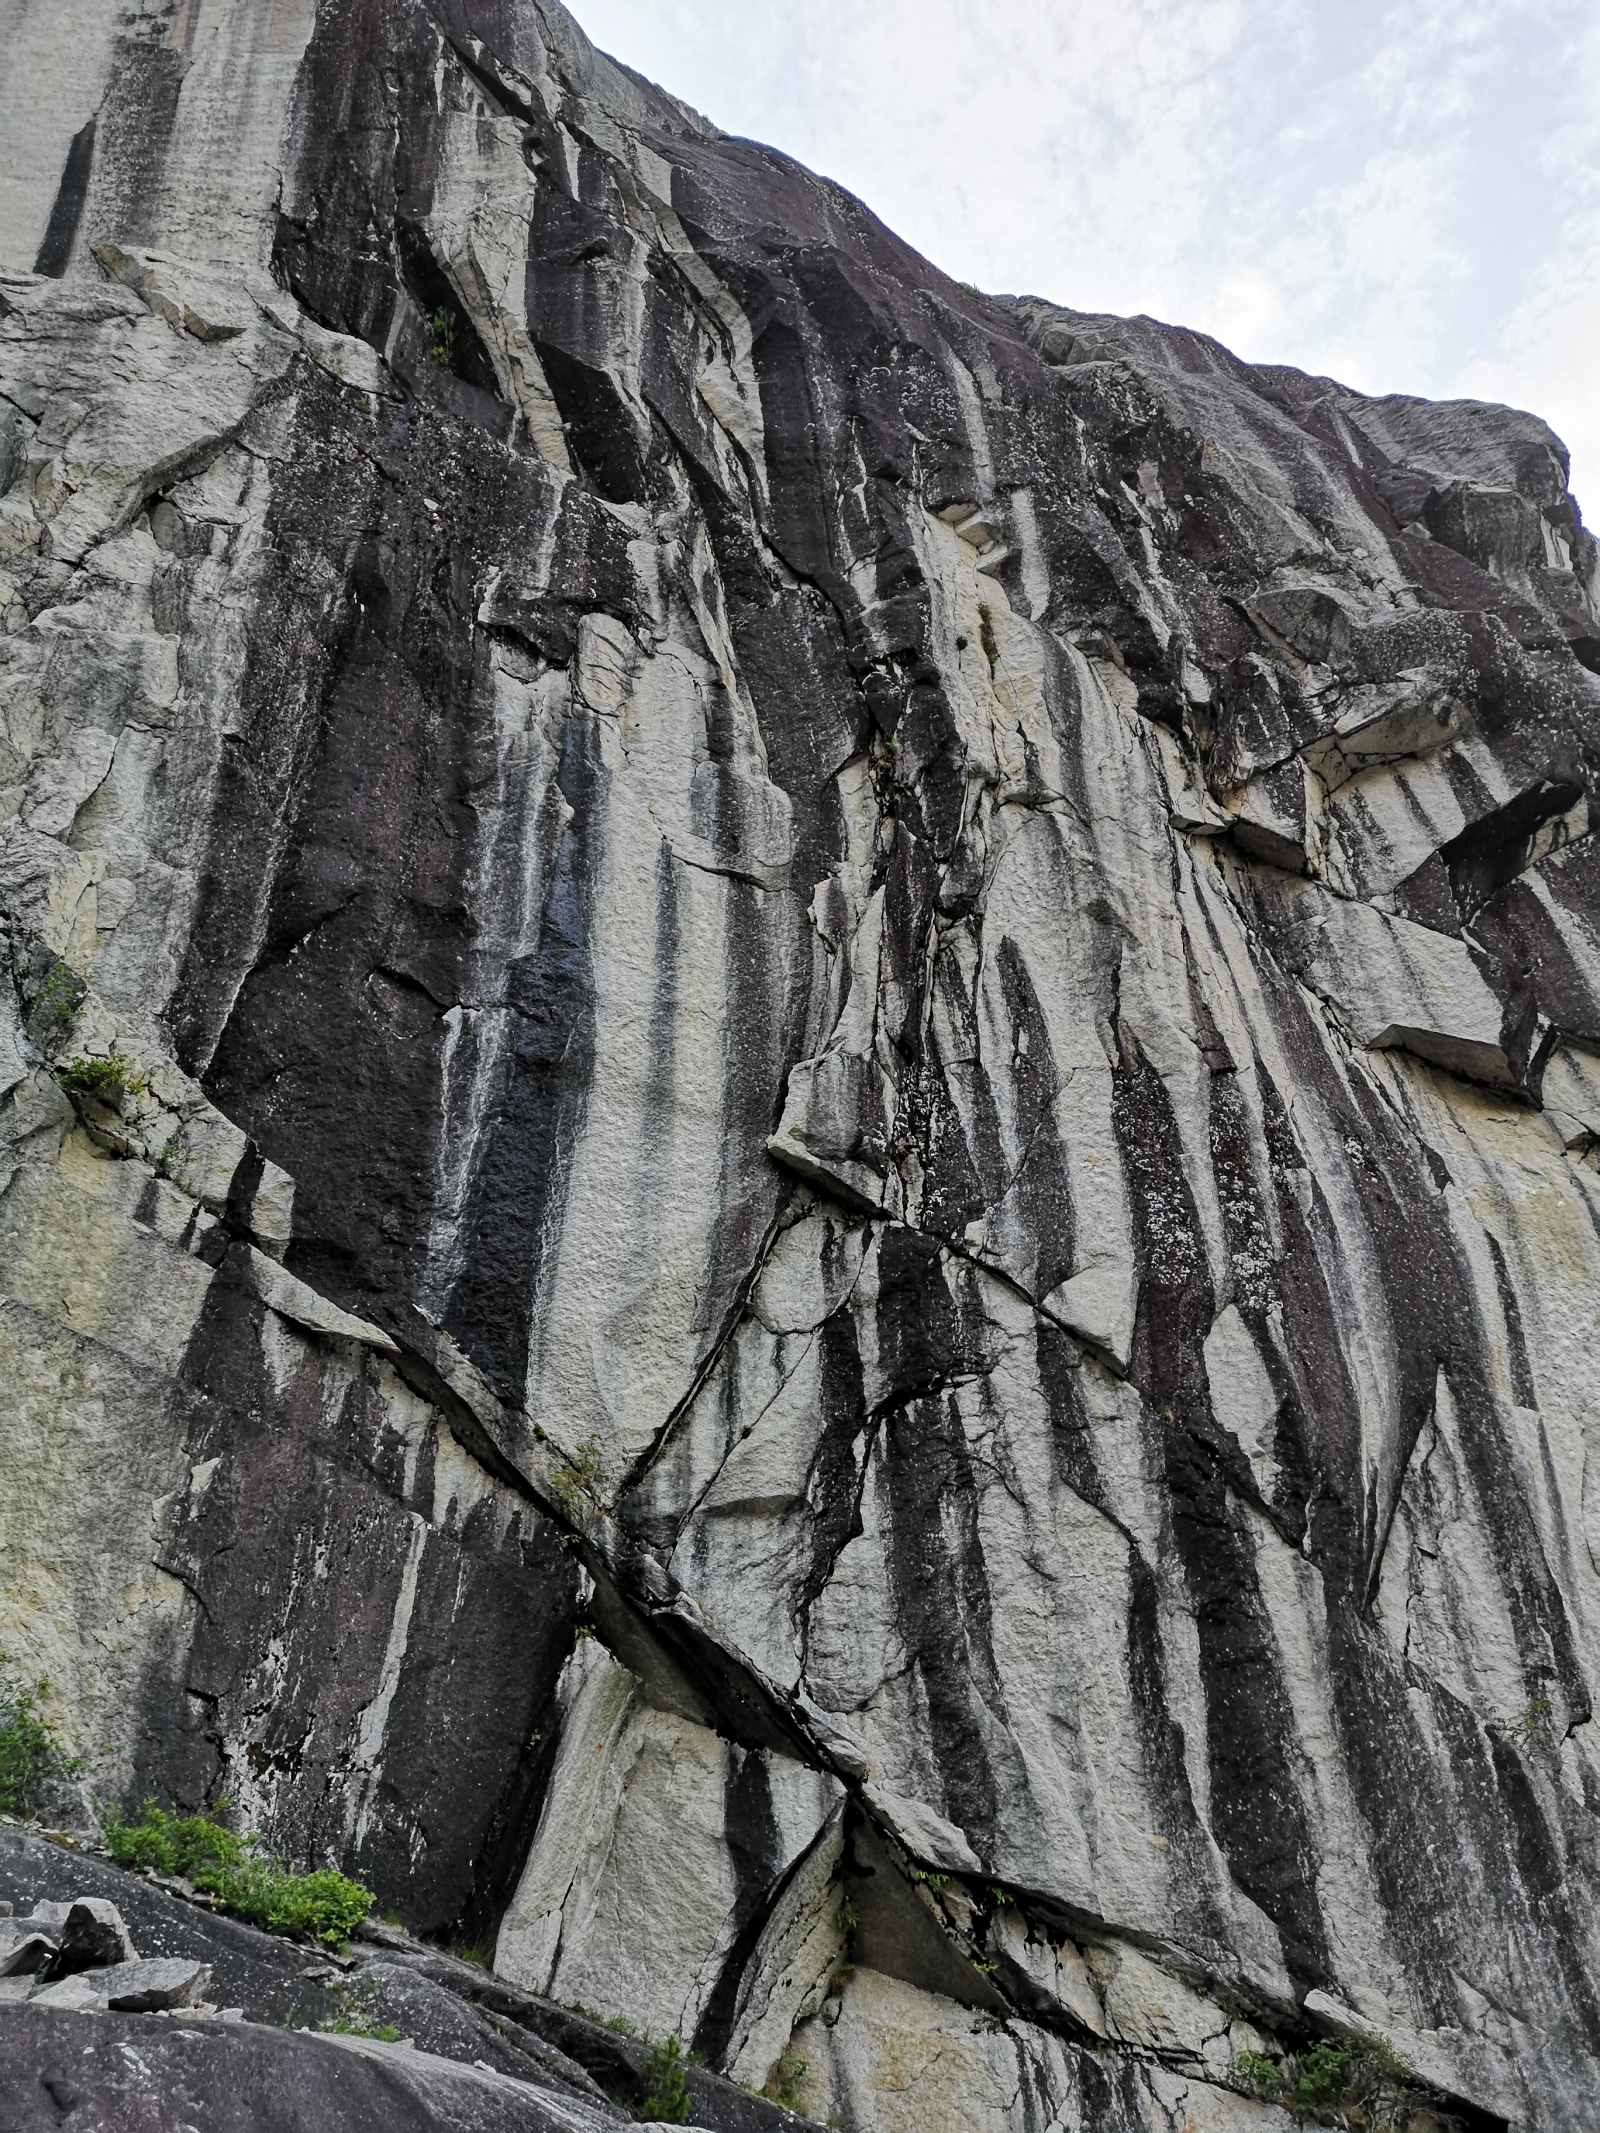
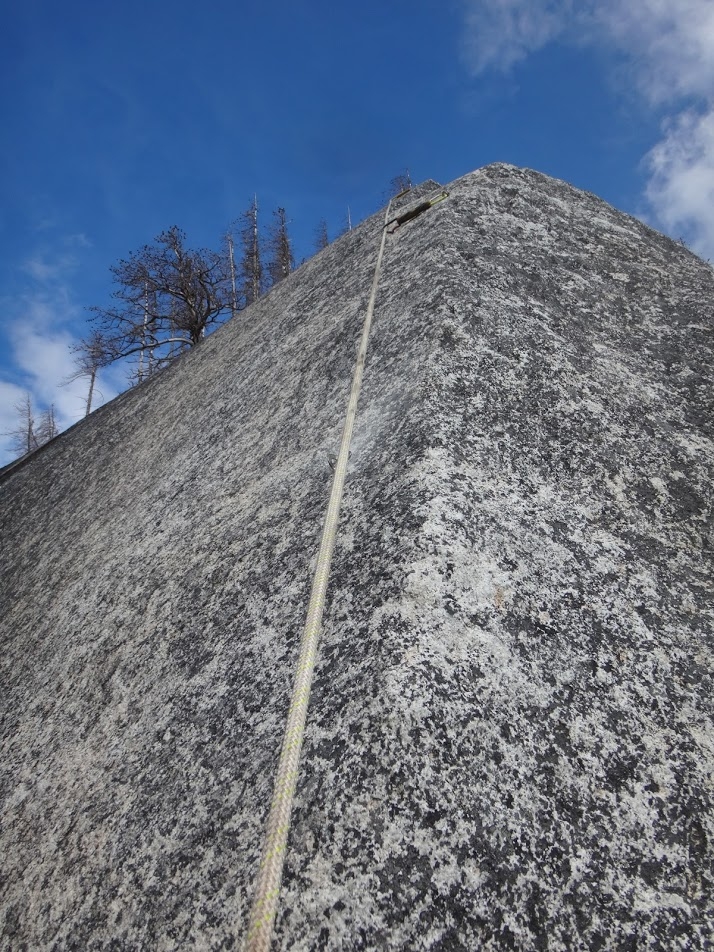
Approach route for the large amphitheatre feature, at the bottom of the wild Eastern walls of Snootli. Flagged and cleared of major obstacles; brushy in spots.
Park at Snootli ice rink, enter the forest and take the "Boulders" trail immediately across the forest road, slightly left of the Snootli Crag/Nuxalk peak trail. Follow trail up and slightly east, past the Snootli West boulders, across a small ravine, to the edge of the 2009 burn - beneath the East walls. Follow a flagged trail up towards the walls; the trail merges with an overflow creekbed for a short while; after reaching the base of the walls (start of Eastern Medicine) continue up for another 15-20min through brush bands and broken slabs into the amphitheatre itself.
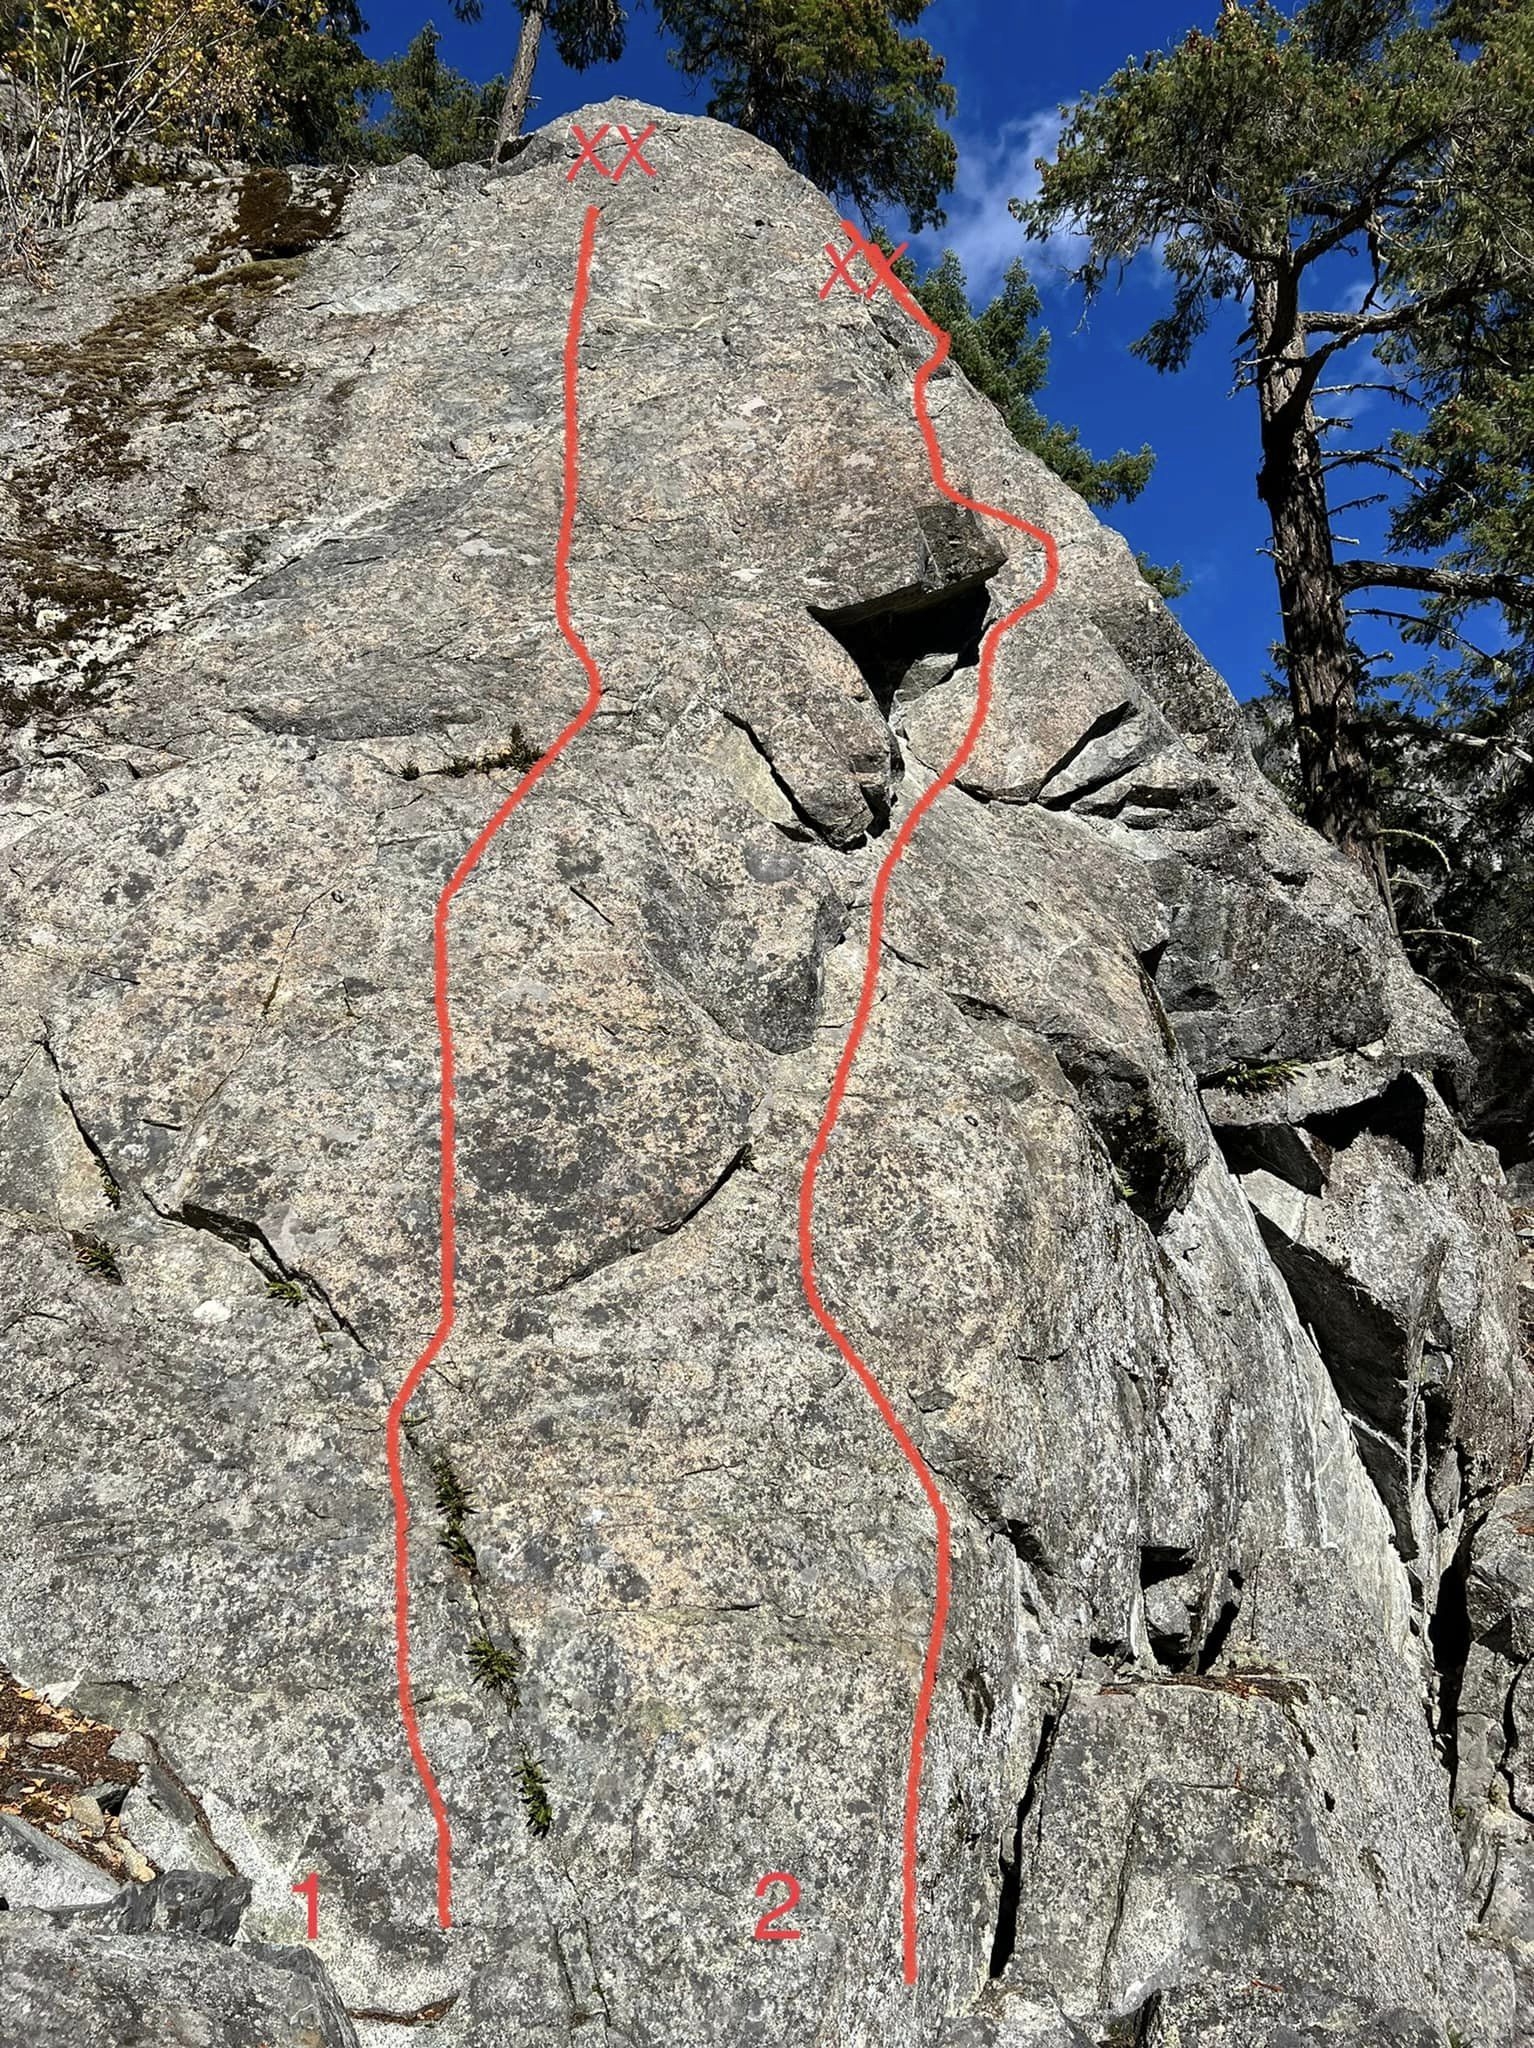
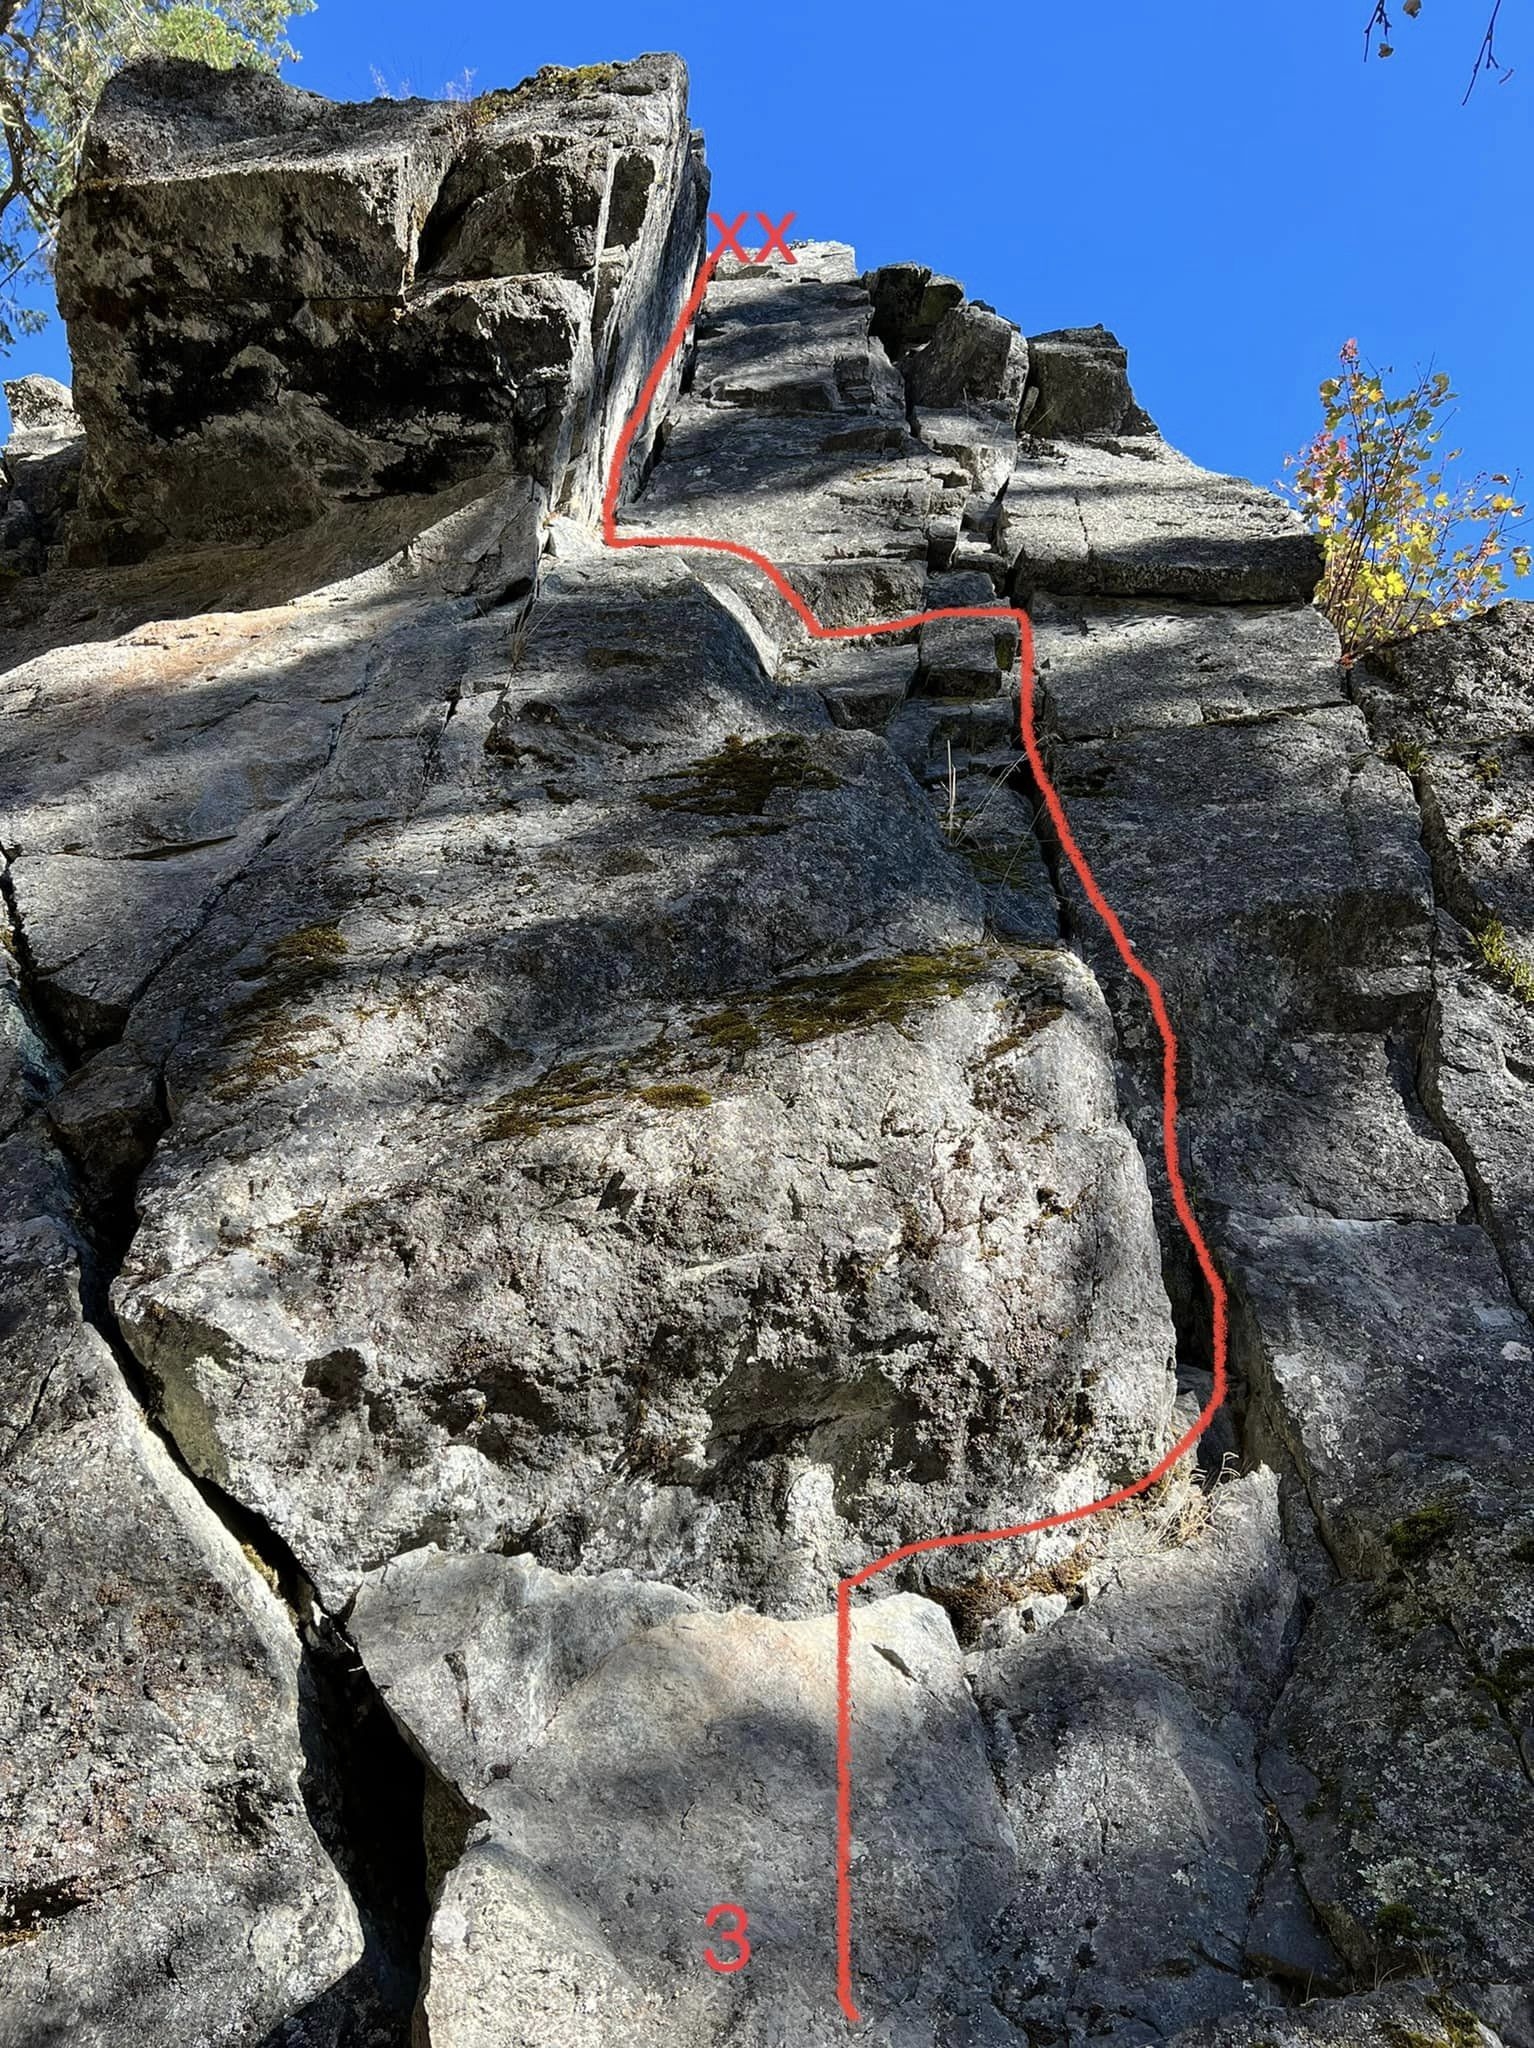
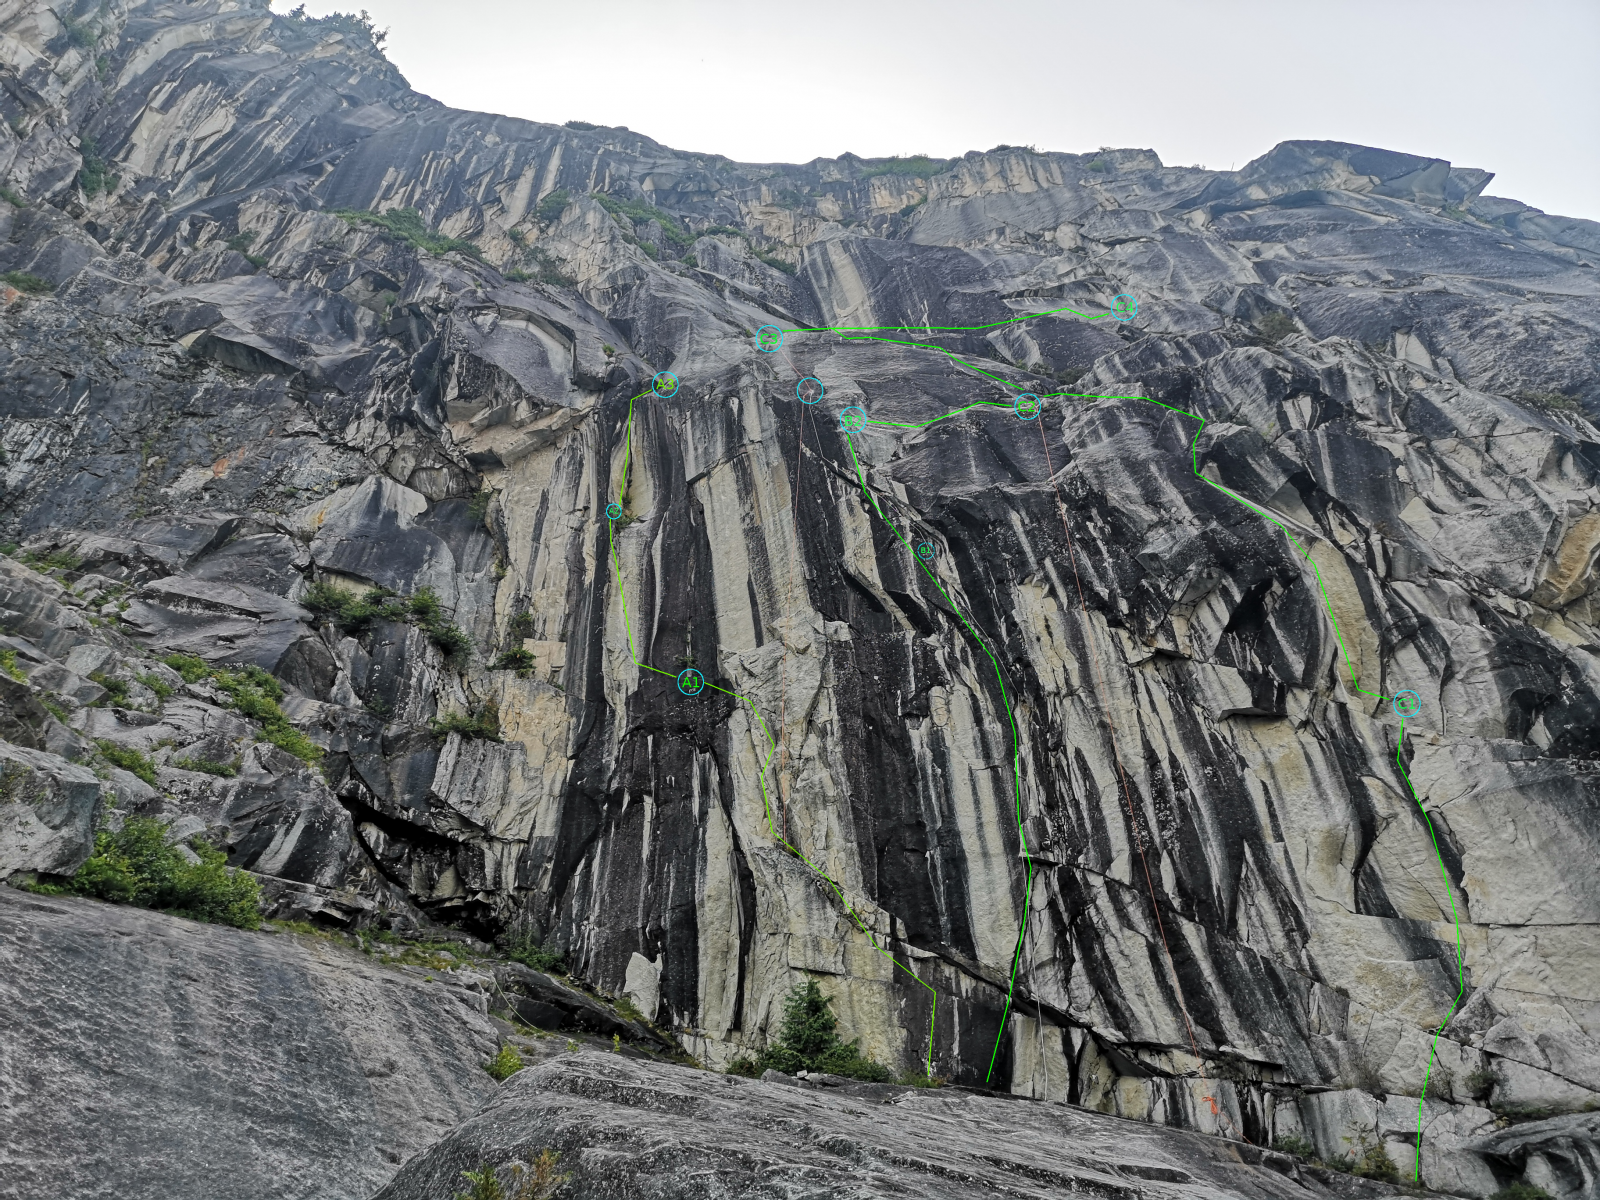
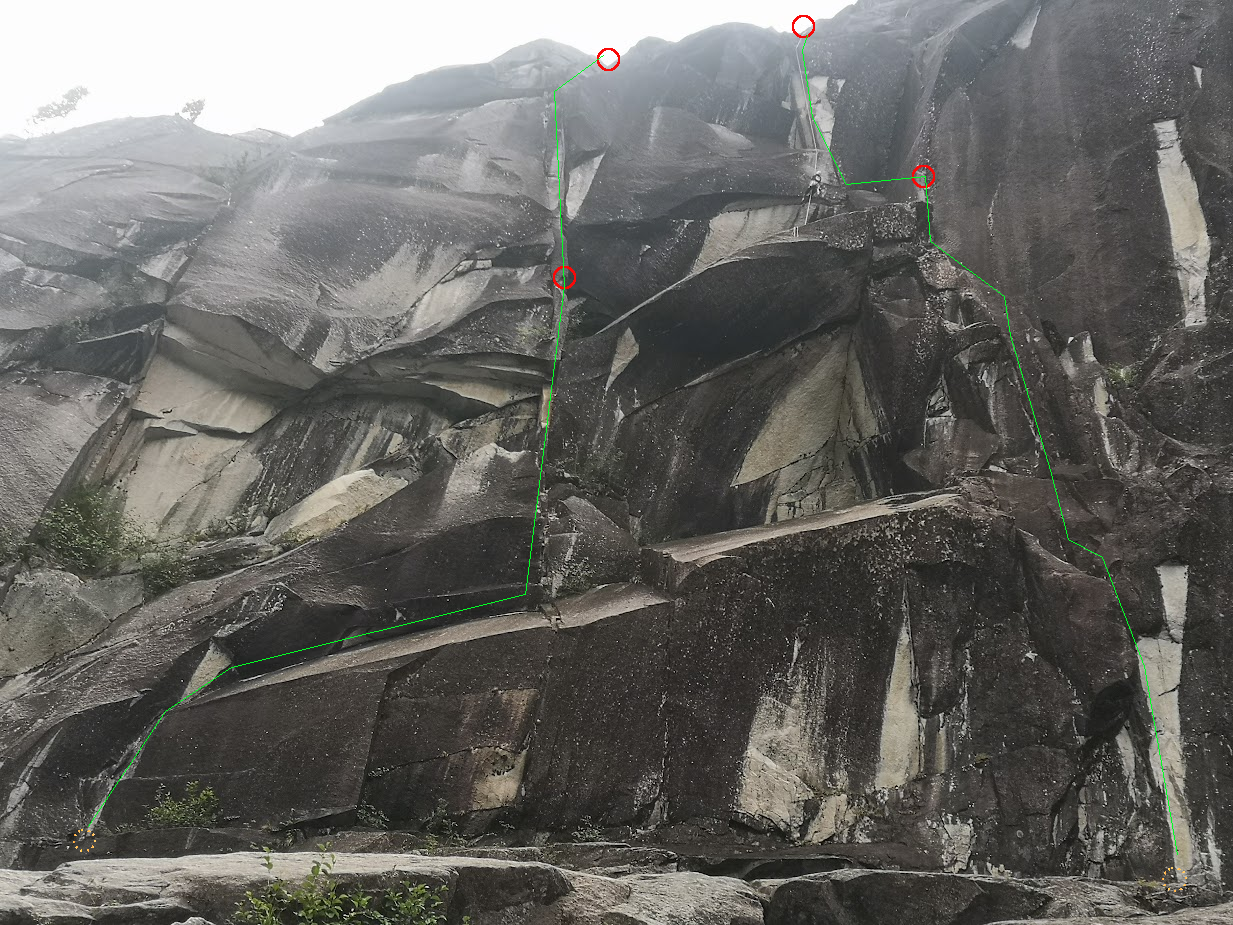
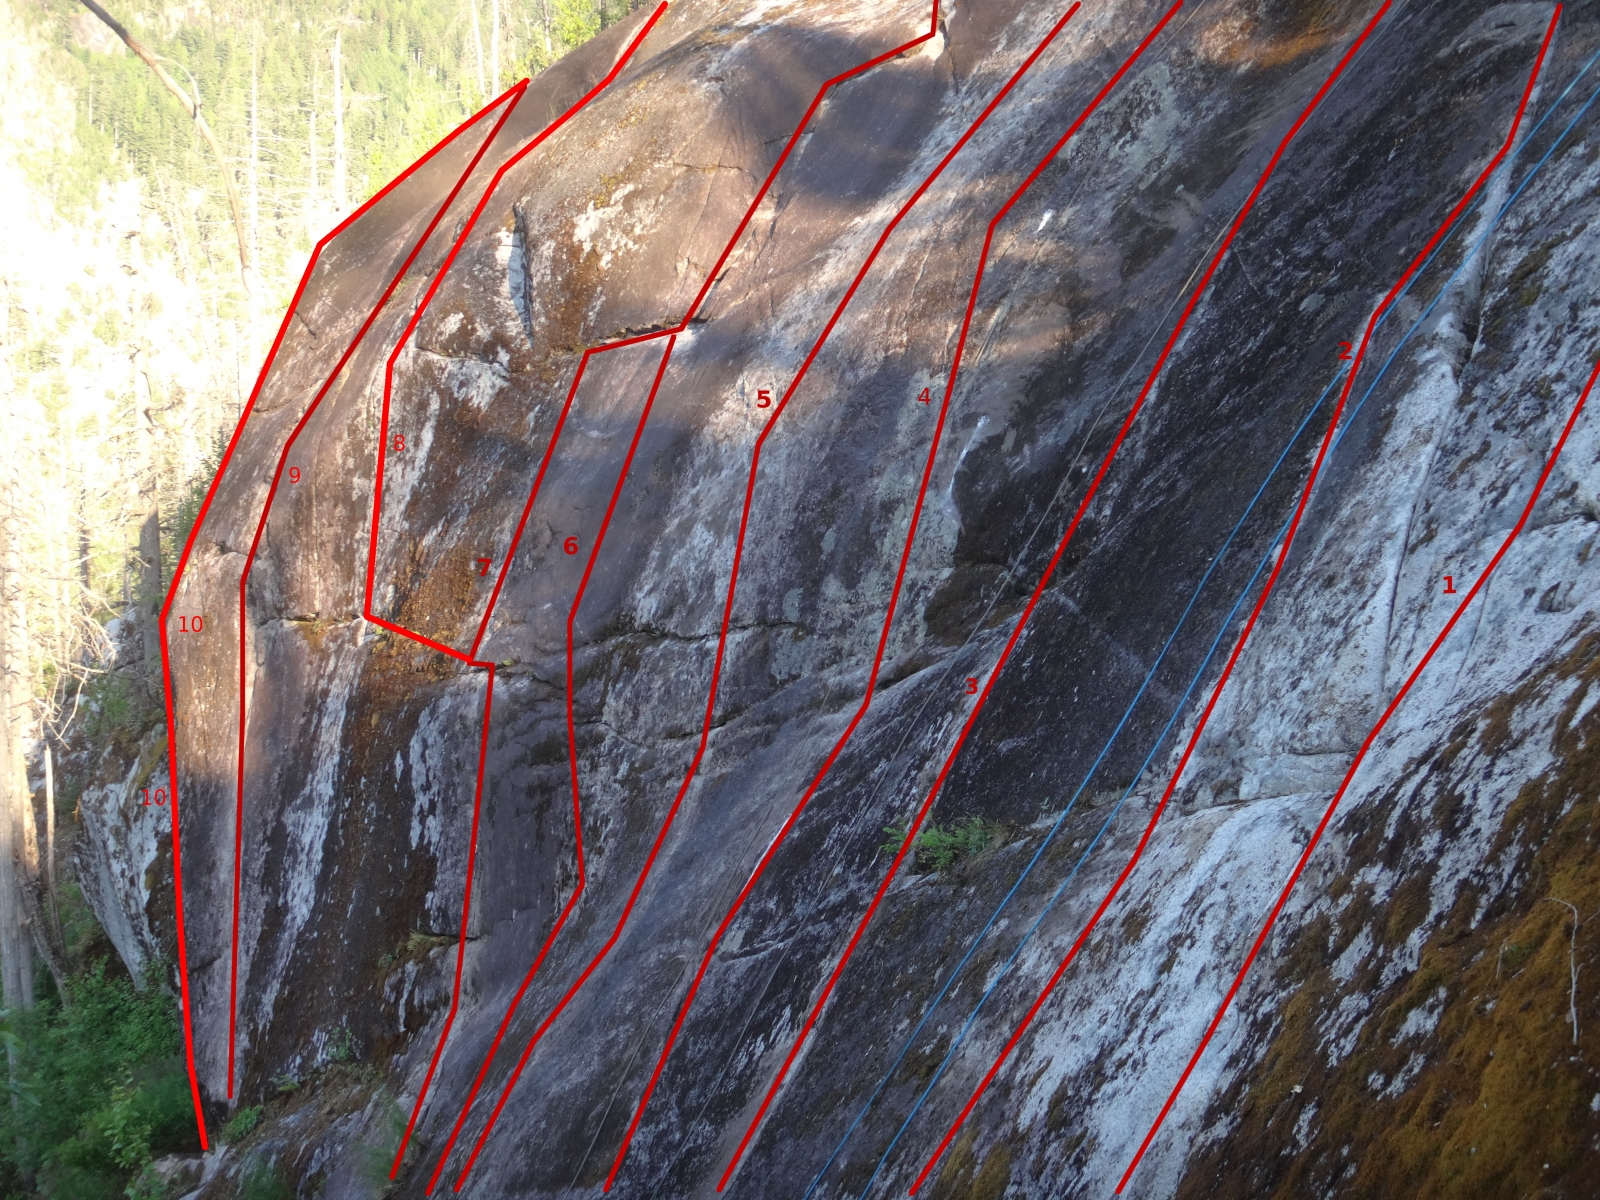
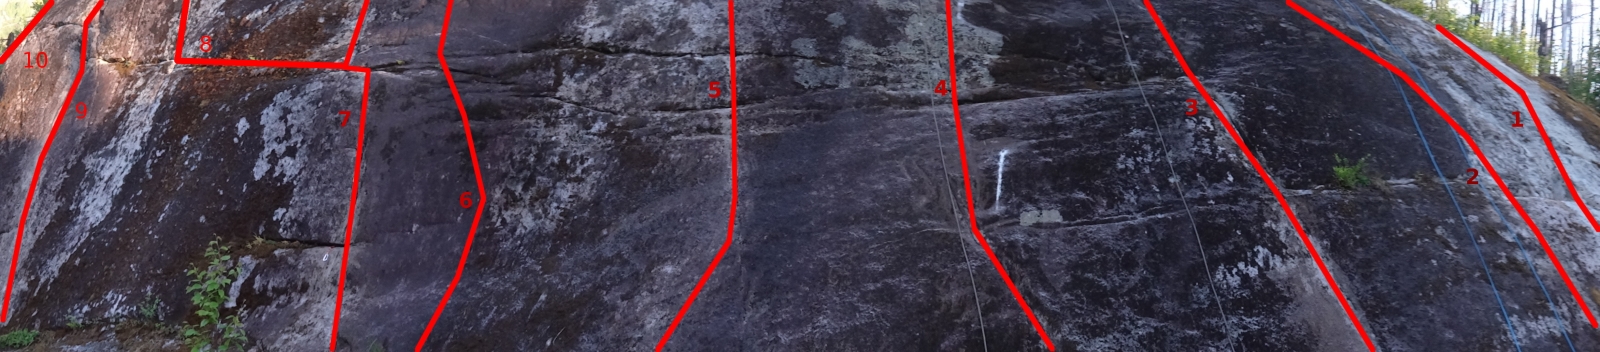
Established routes include:
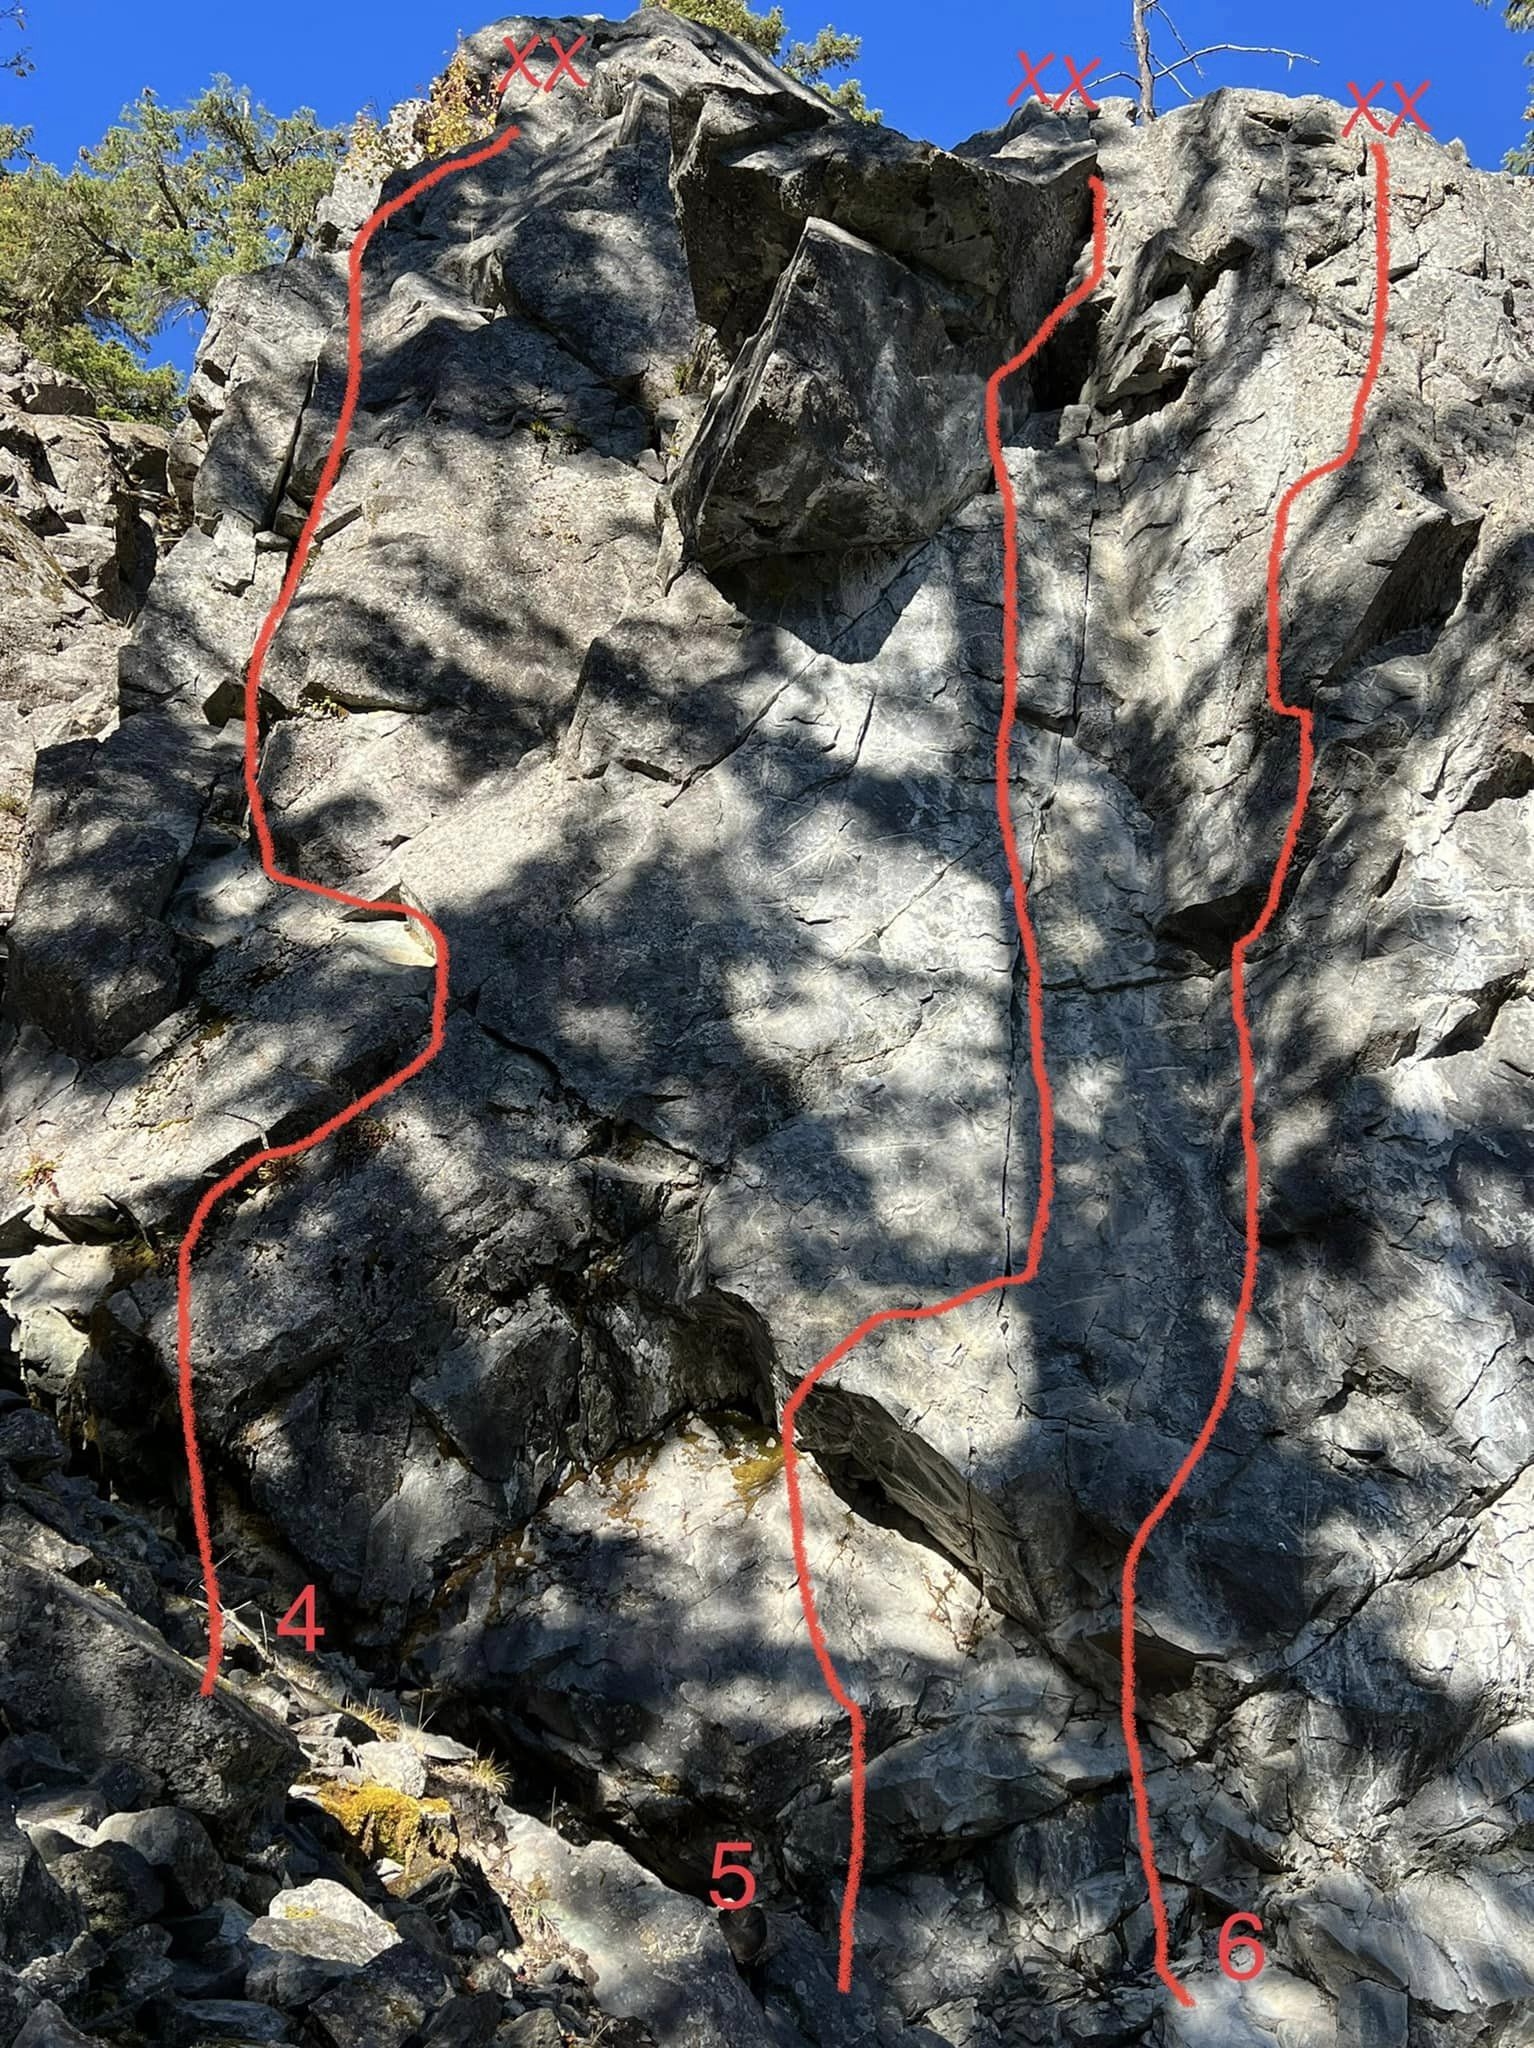
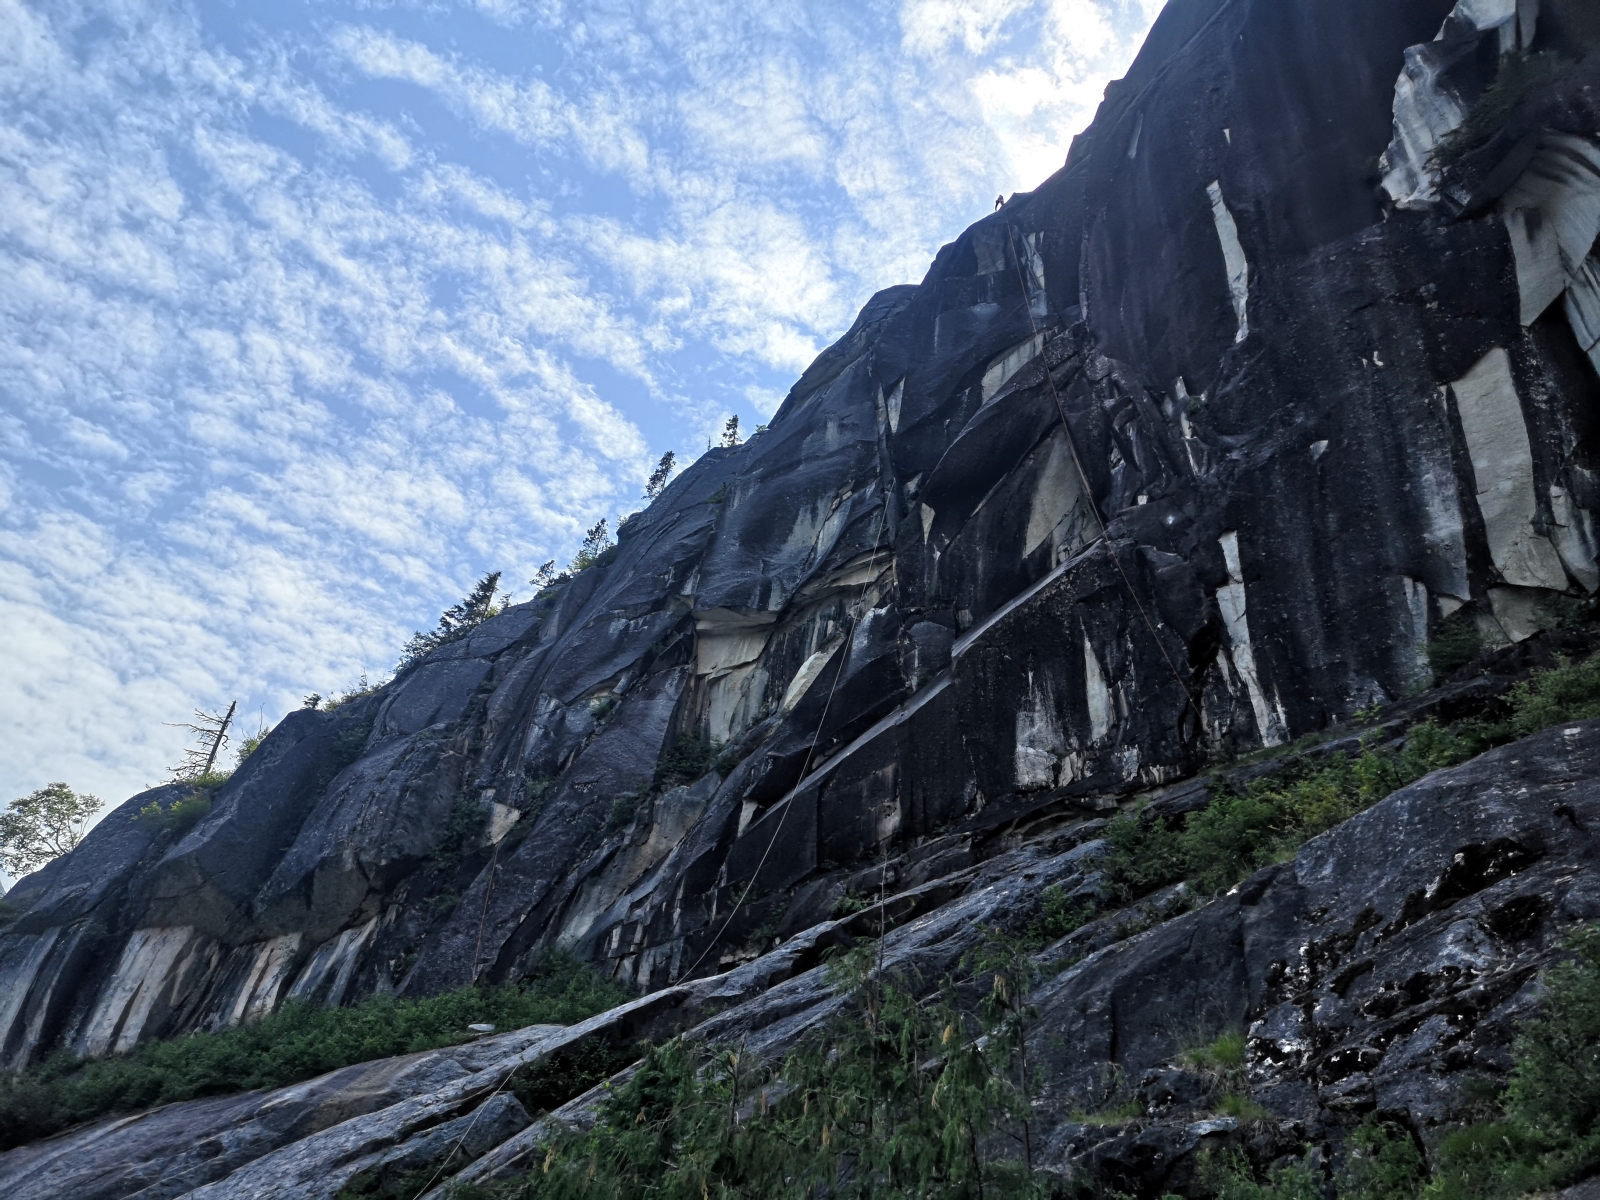
North Wall (right):
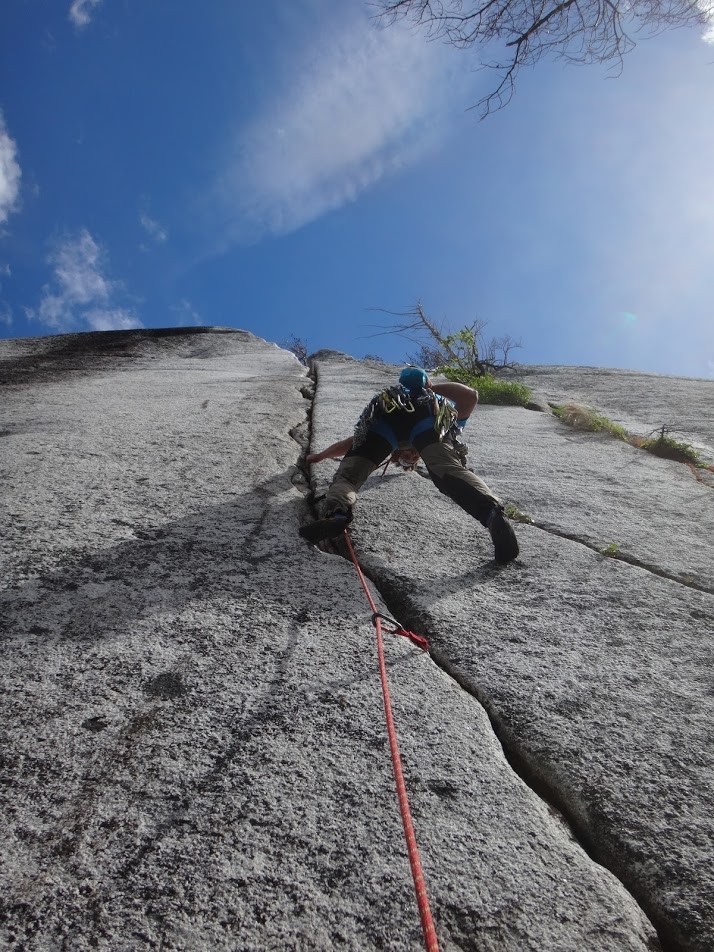
Ninja - Pitch 1 - 5.11+ - 25m: Start up a crack to the left of the first bolt; consider a gear anchor there for belayer as well. Gain the starting ledge and first bolt, and begin powerful face climbing on positive holds past 5 bolts leading to a steep arch. Gain the arch with a distinctive ninja kick move out right; claw through a couple poor jams to a good lock and good gear. Continue up the arch on mostly excellent jams, to a juggy undercling flake, and then step right past a final bolt protecting the thin exit boulder problem. Mantle over the arete to anchor with rap rings. A powerful, pumpy and fun pitch. Pitch 2 - TBD. FA 2025 Clinton Leung
Nash Crack - Single pitch - 5.12? - 35m: TBD.
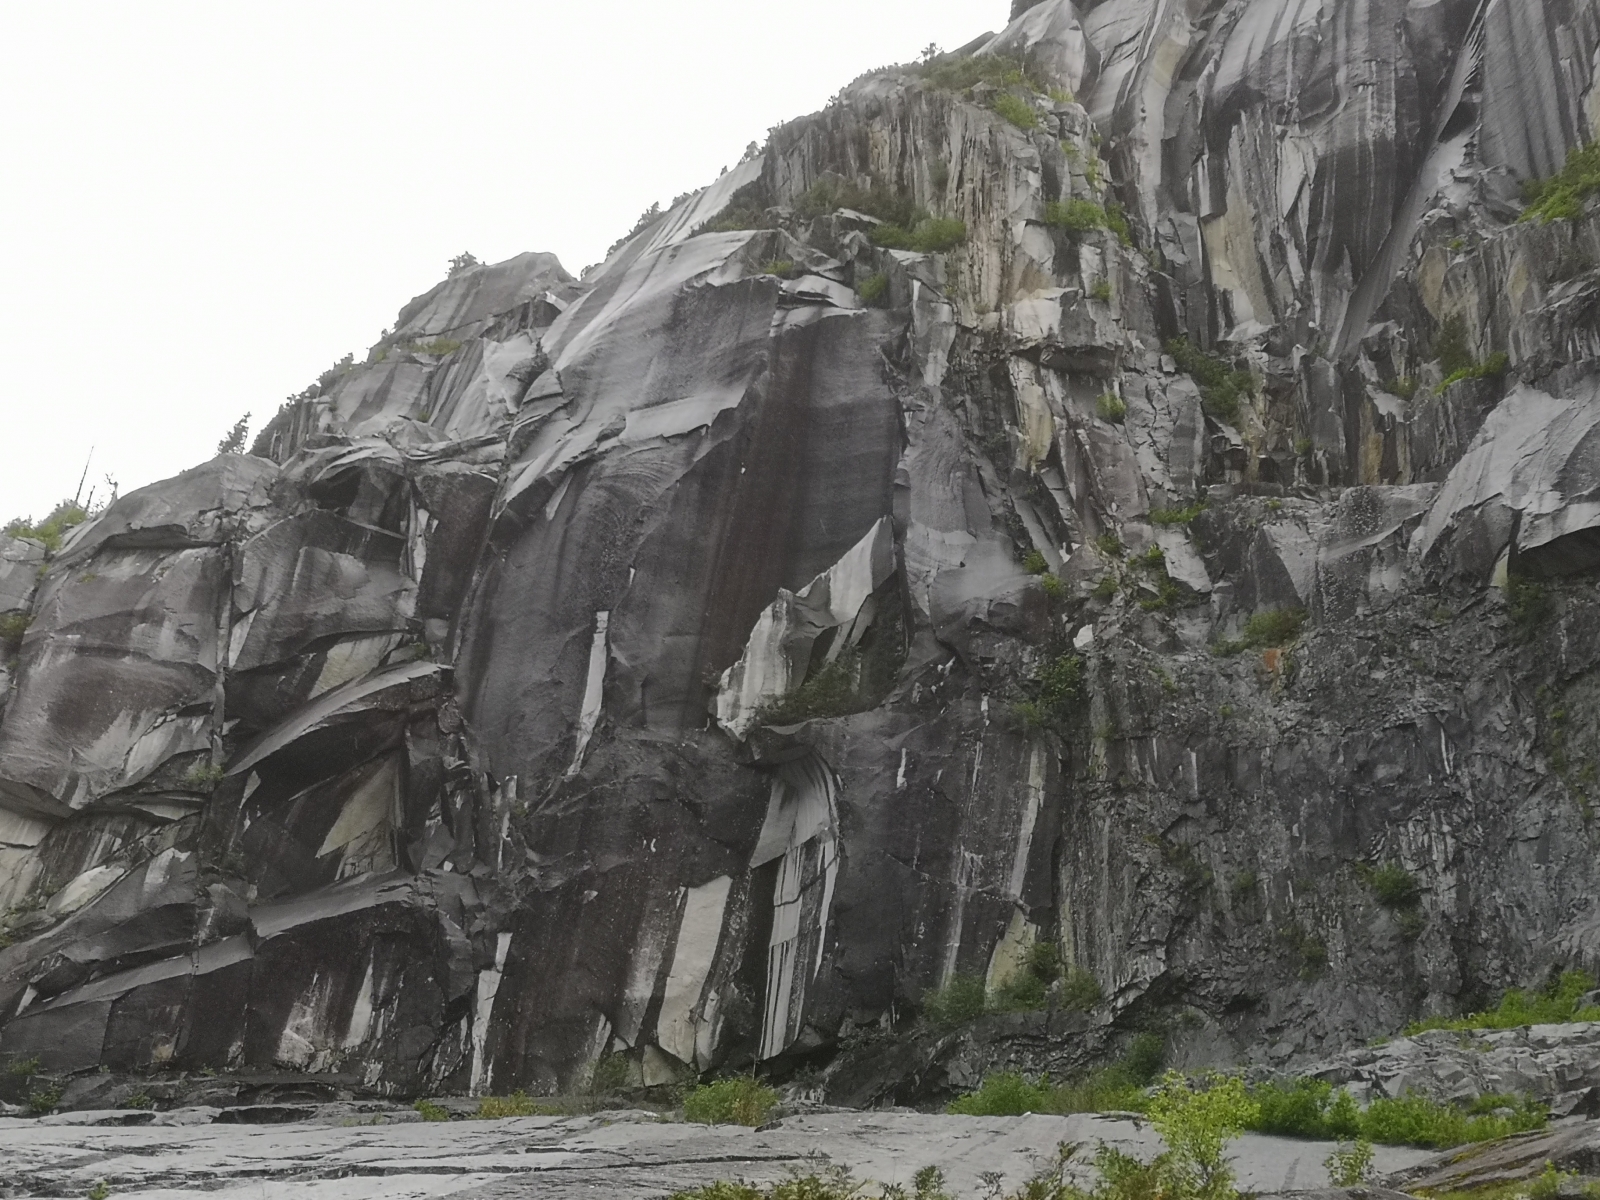
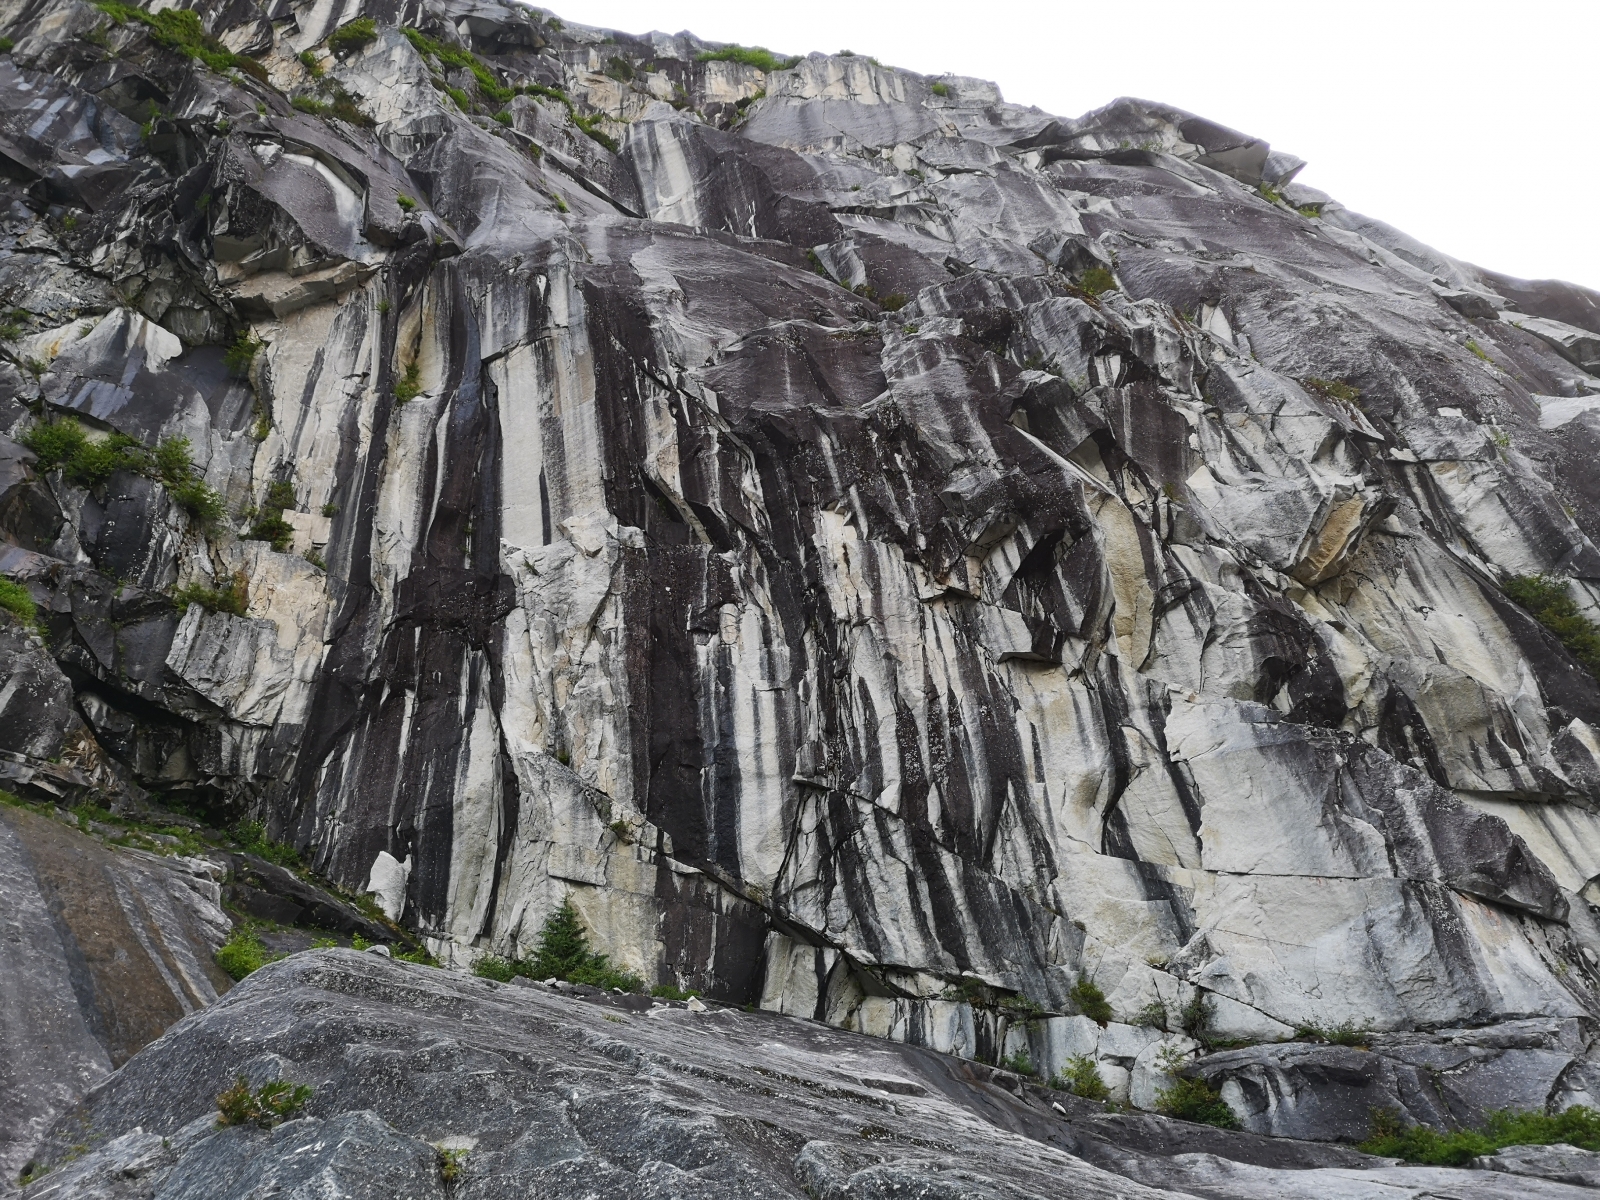
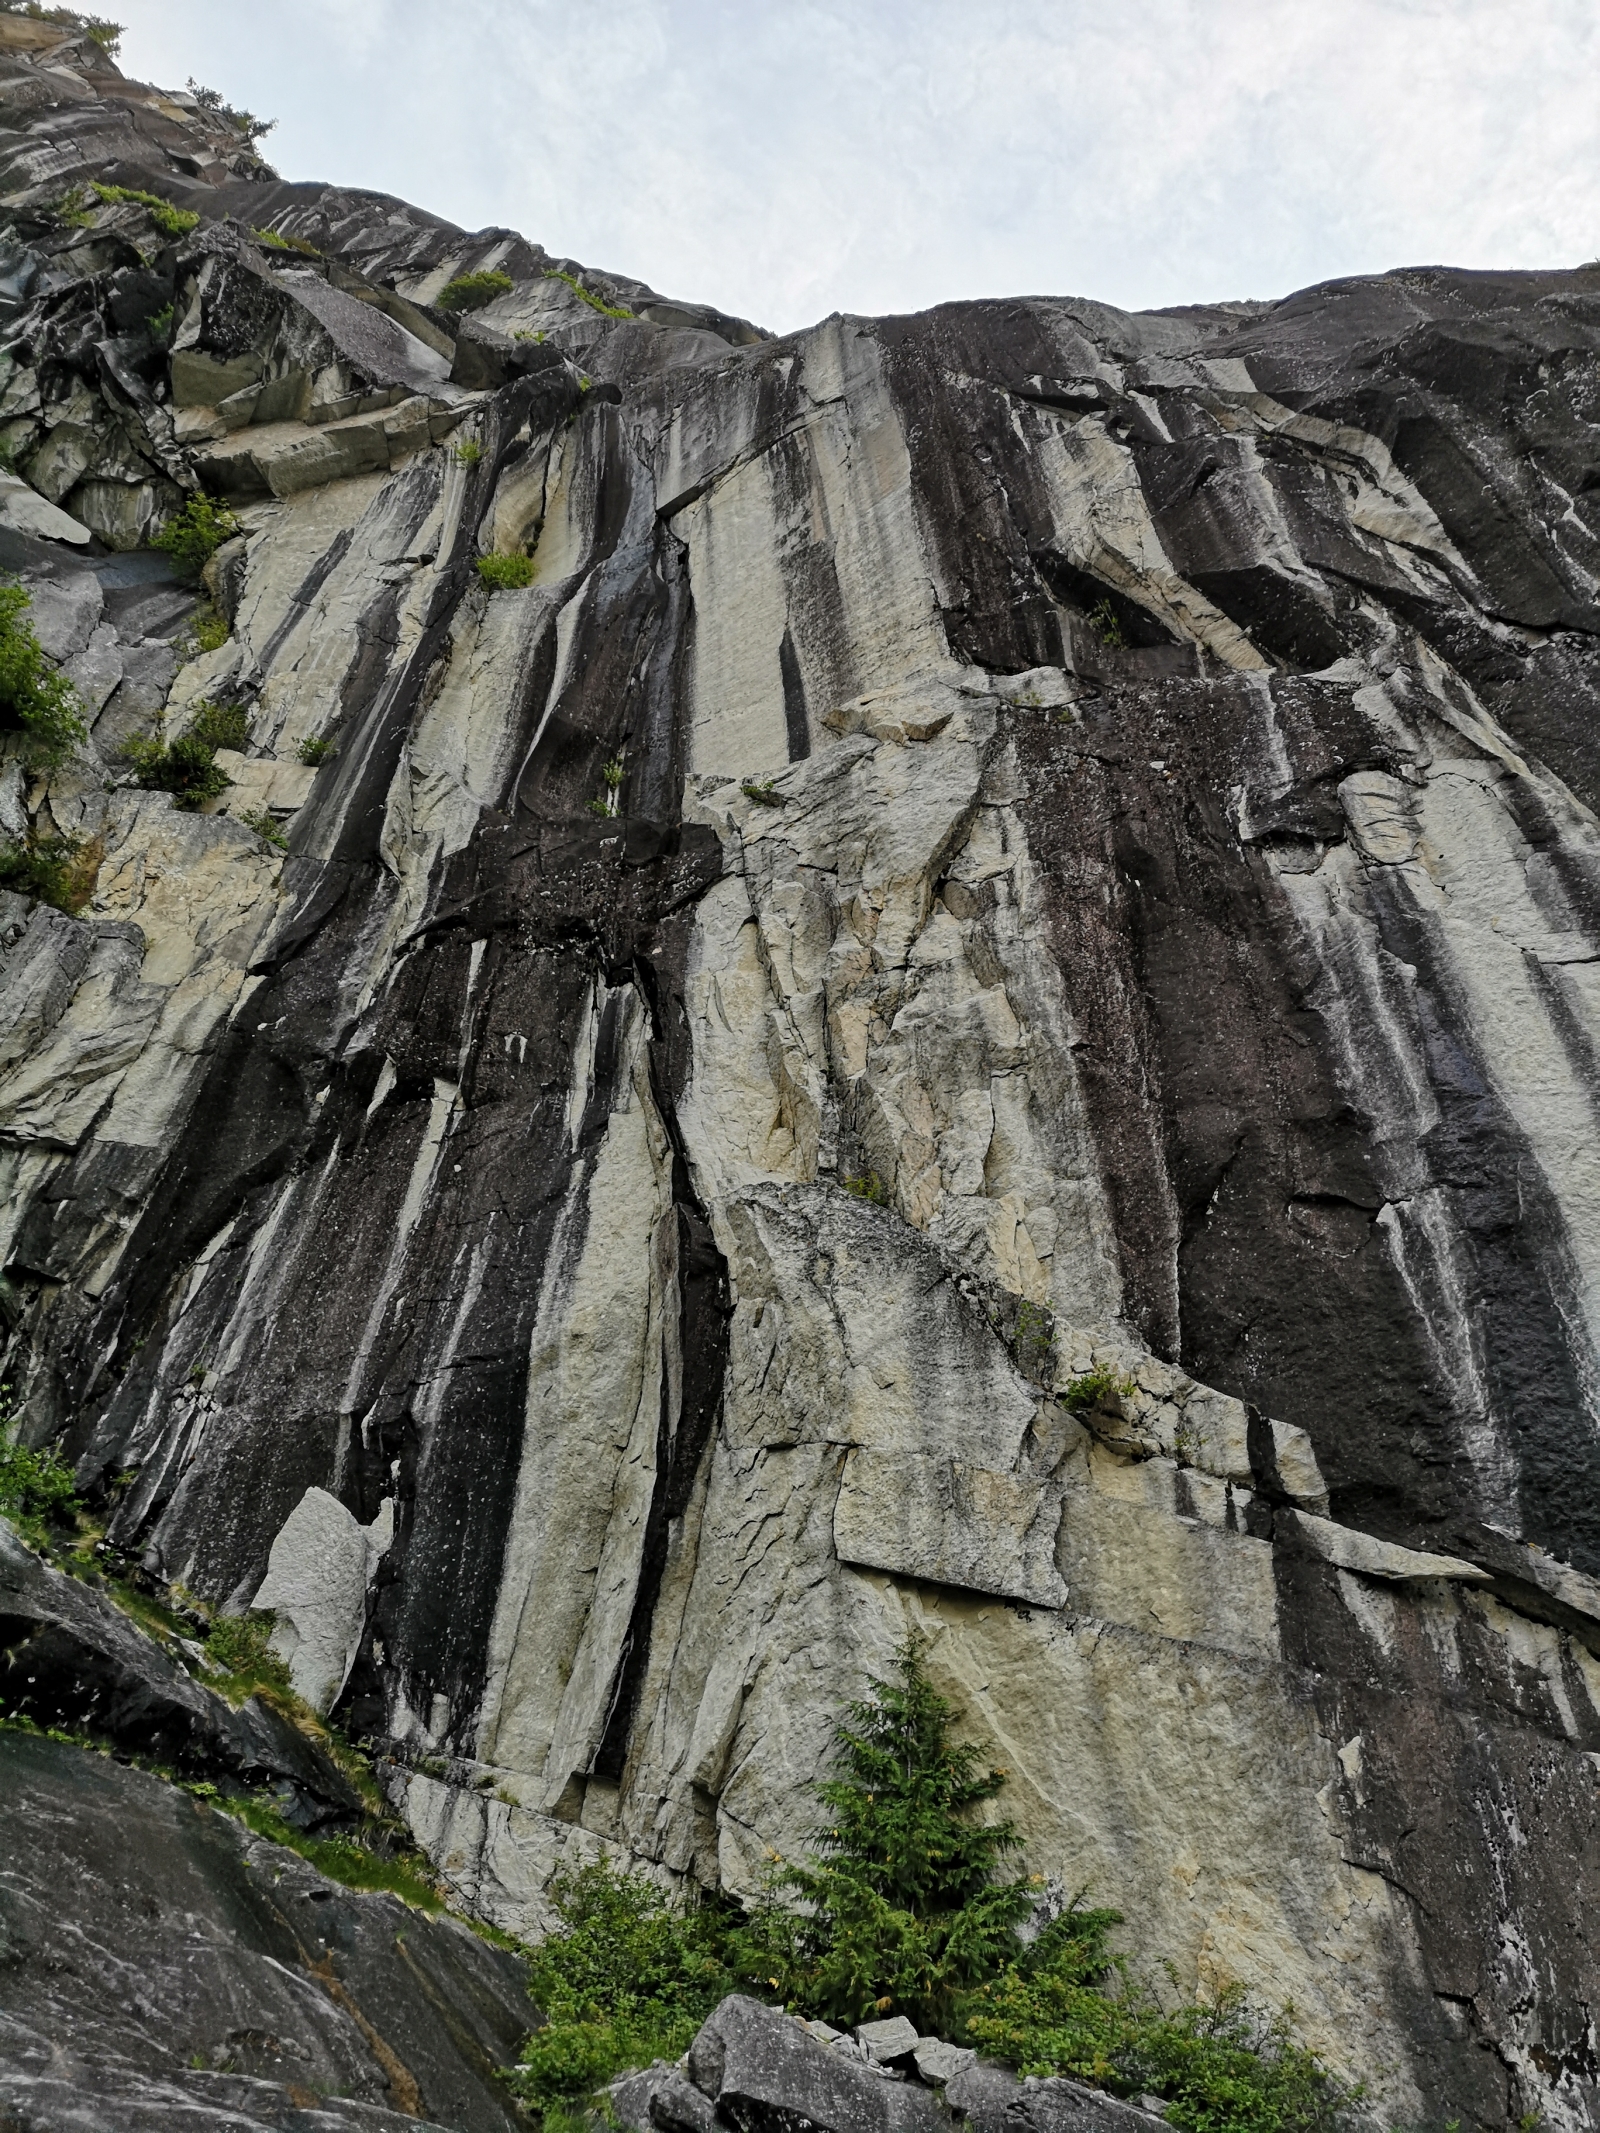
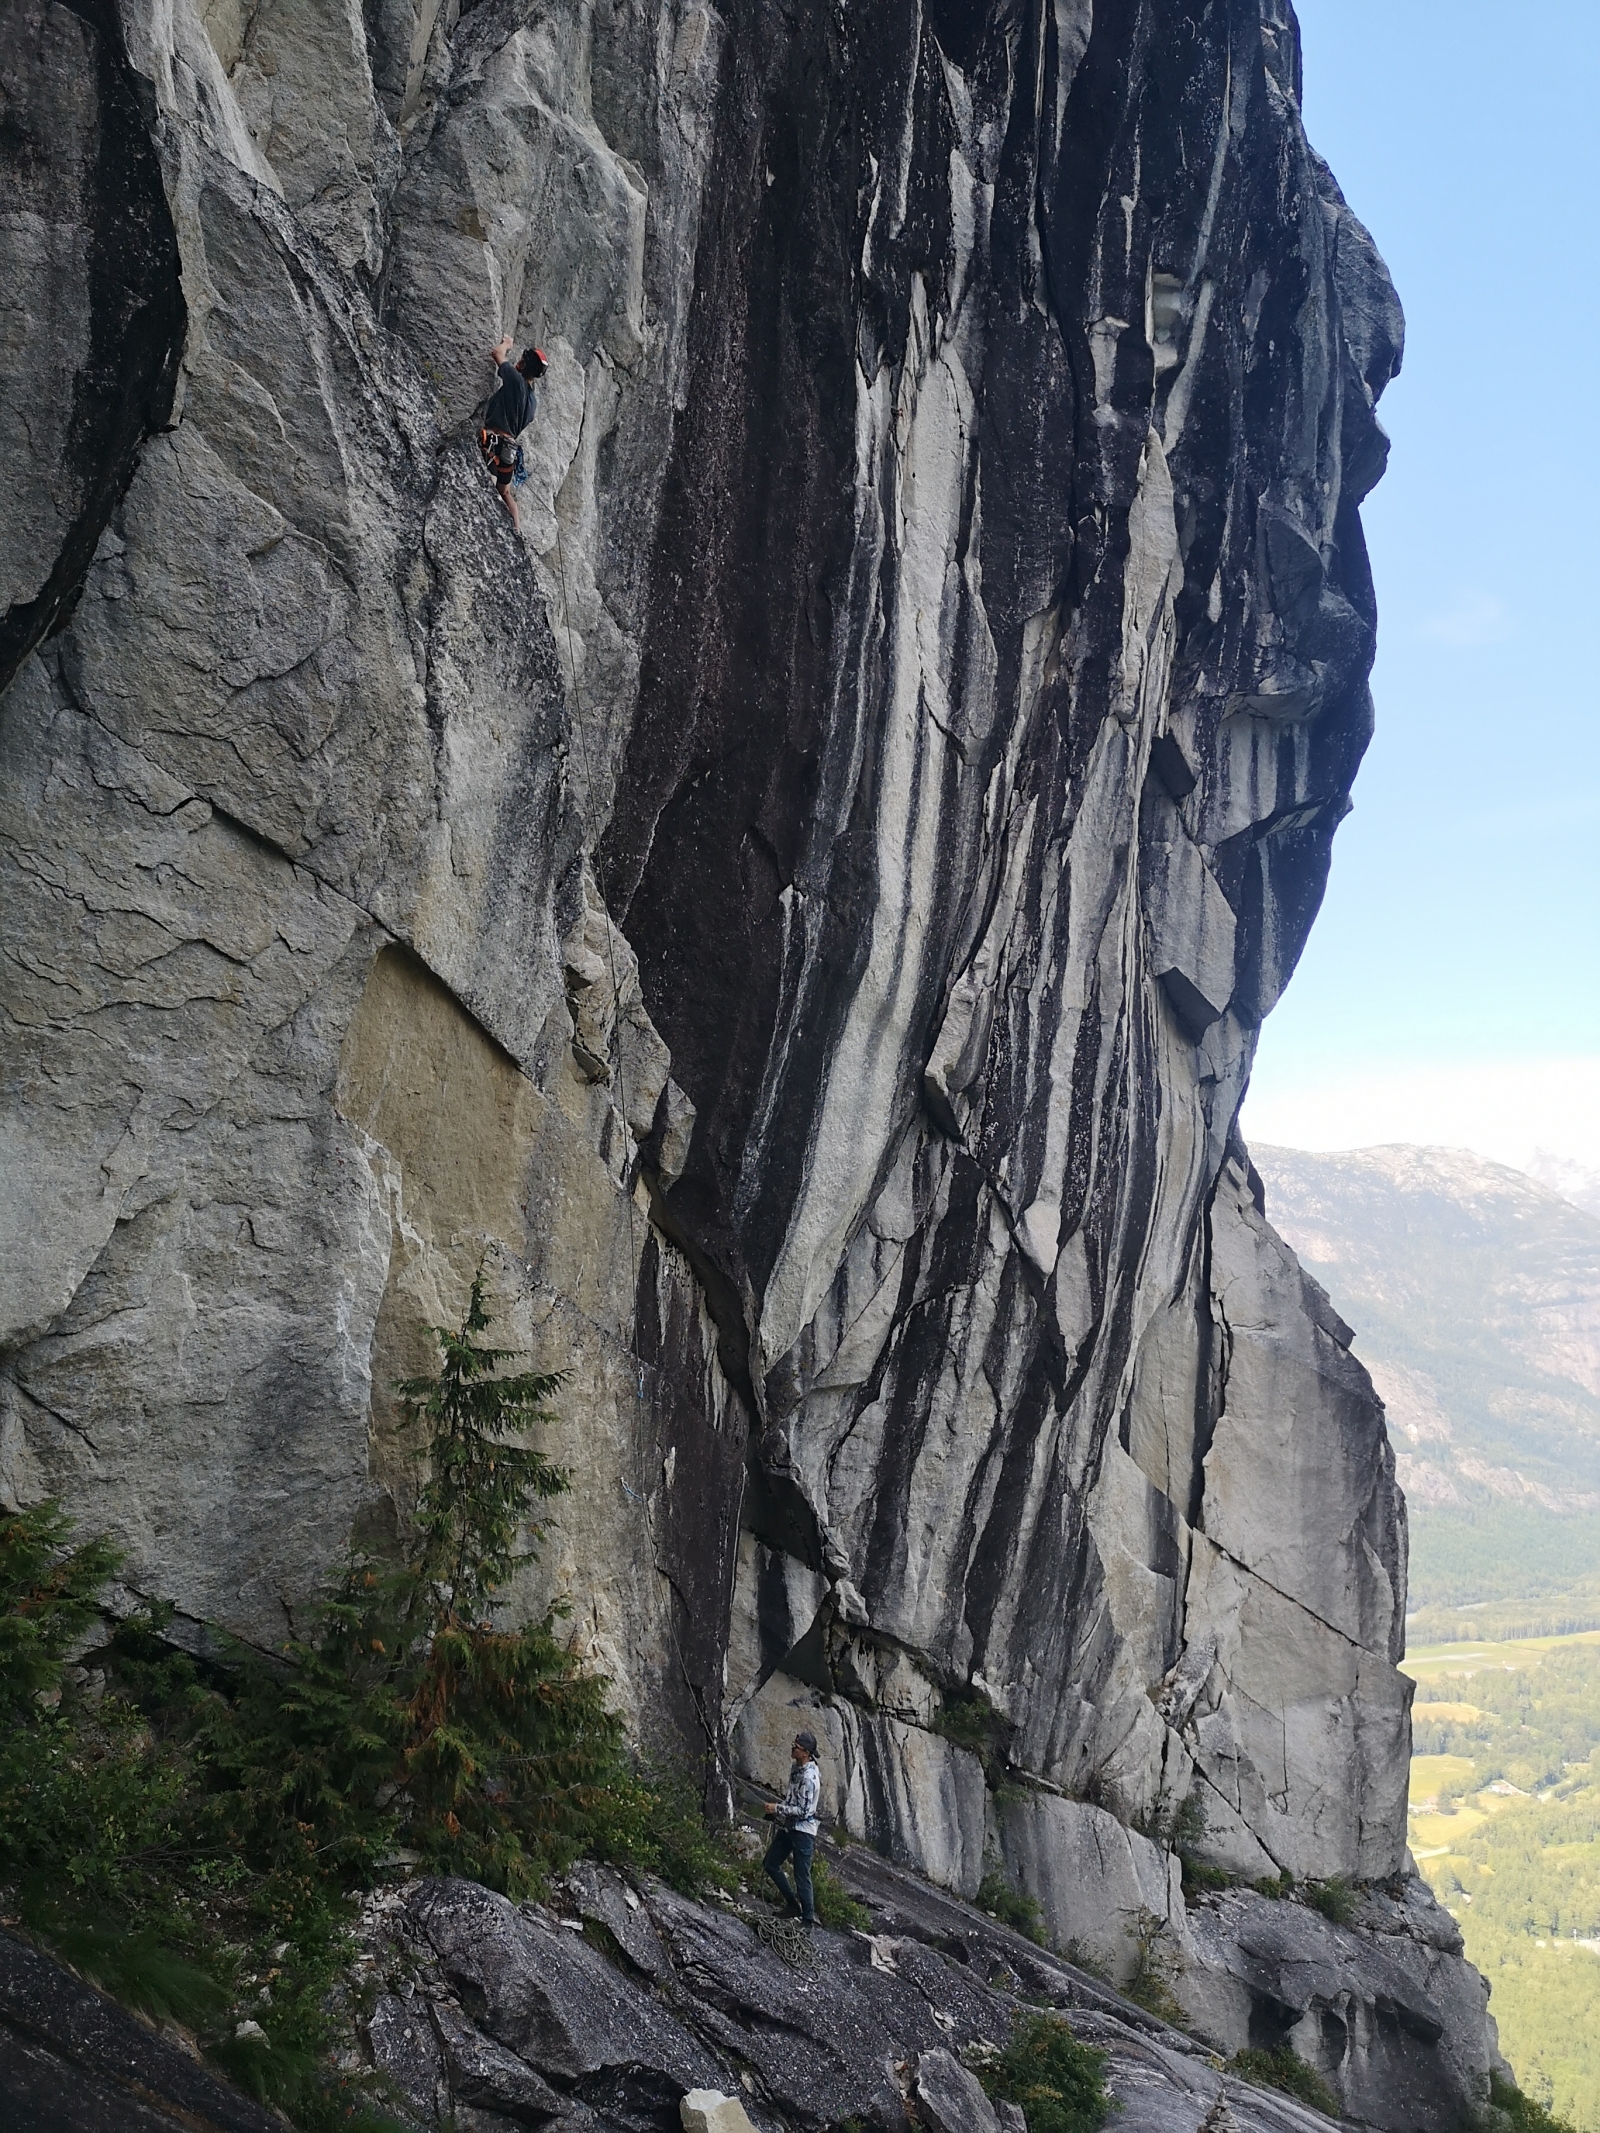
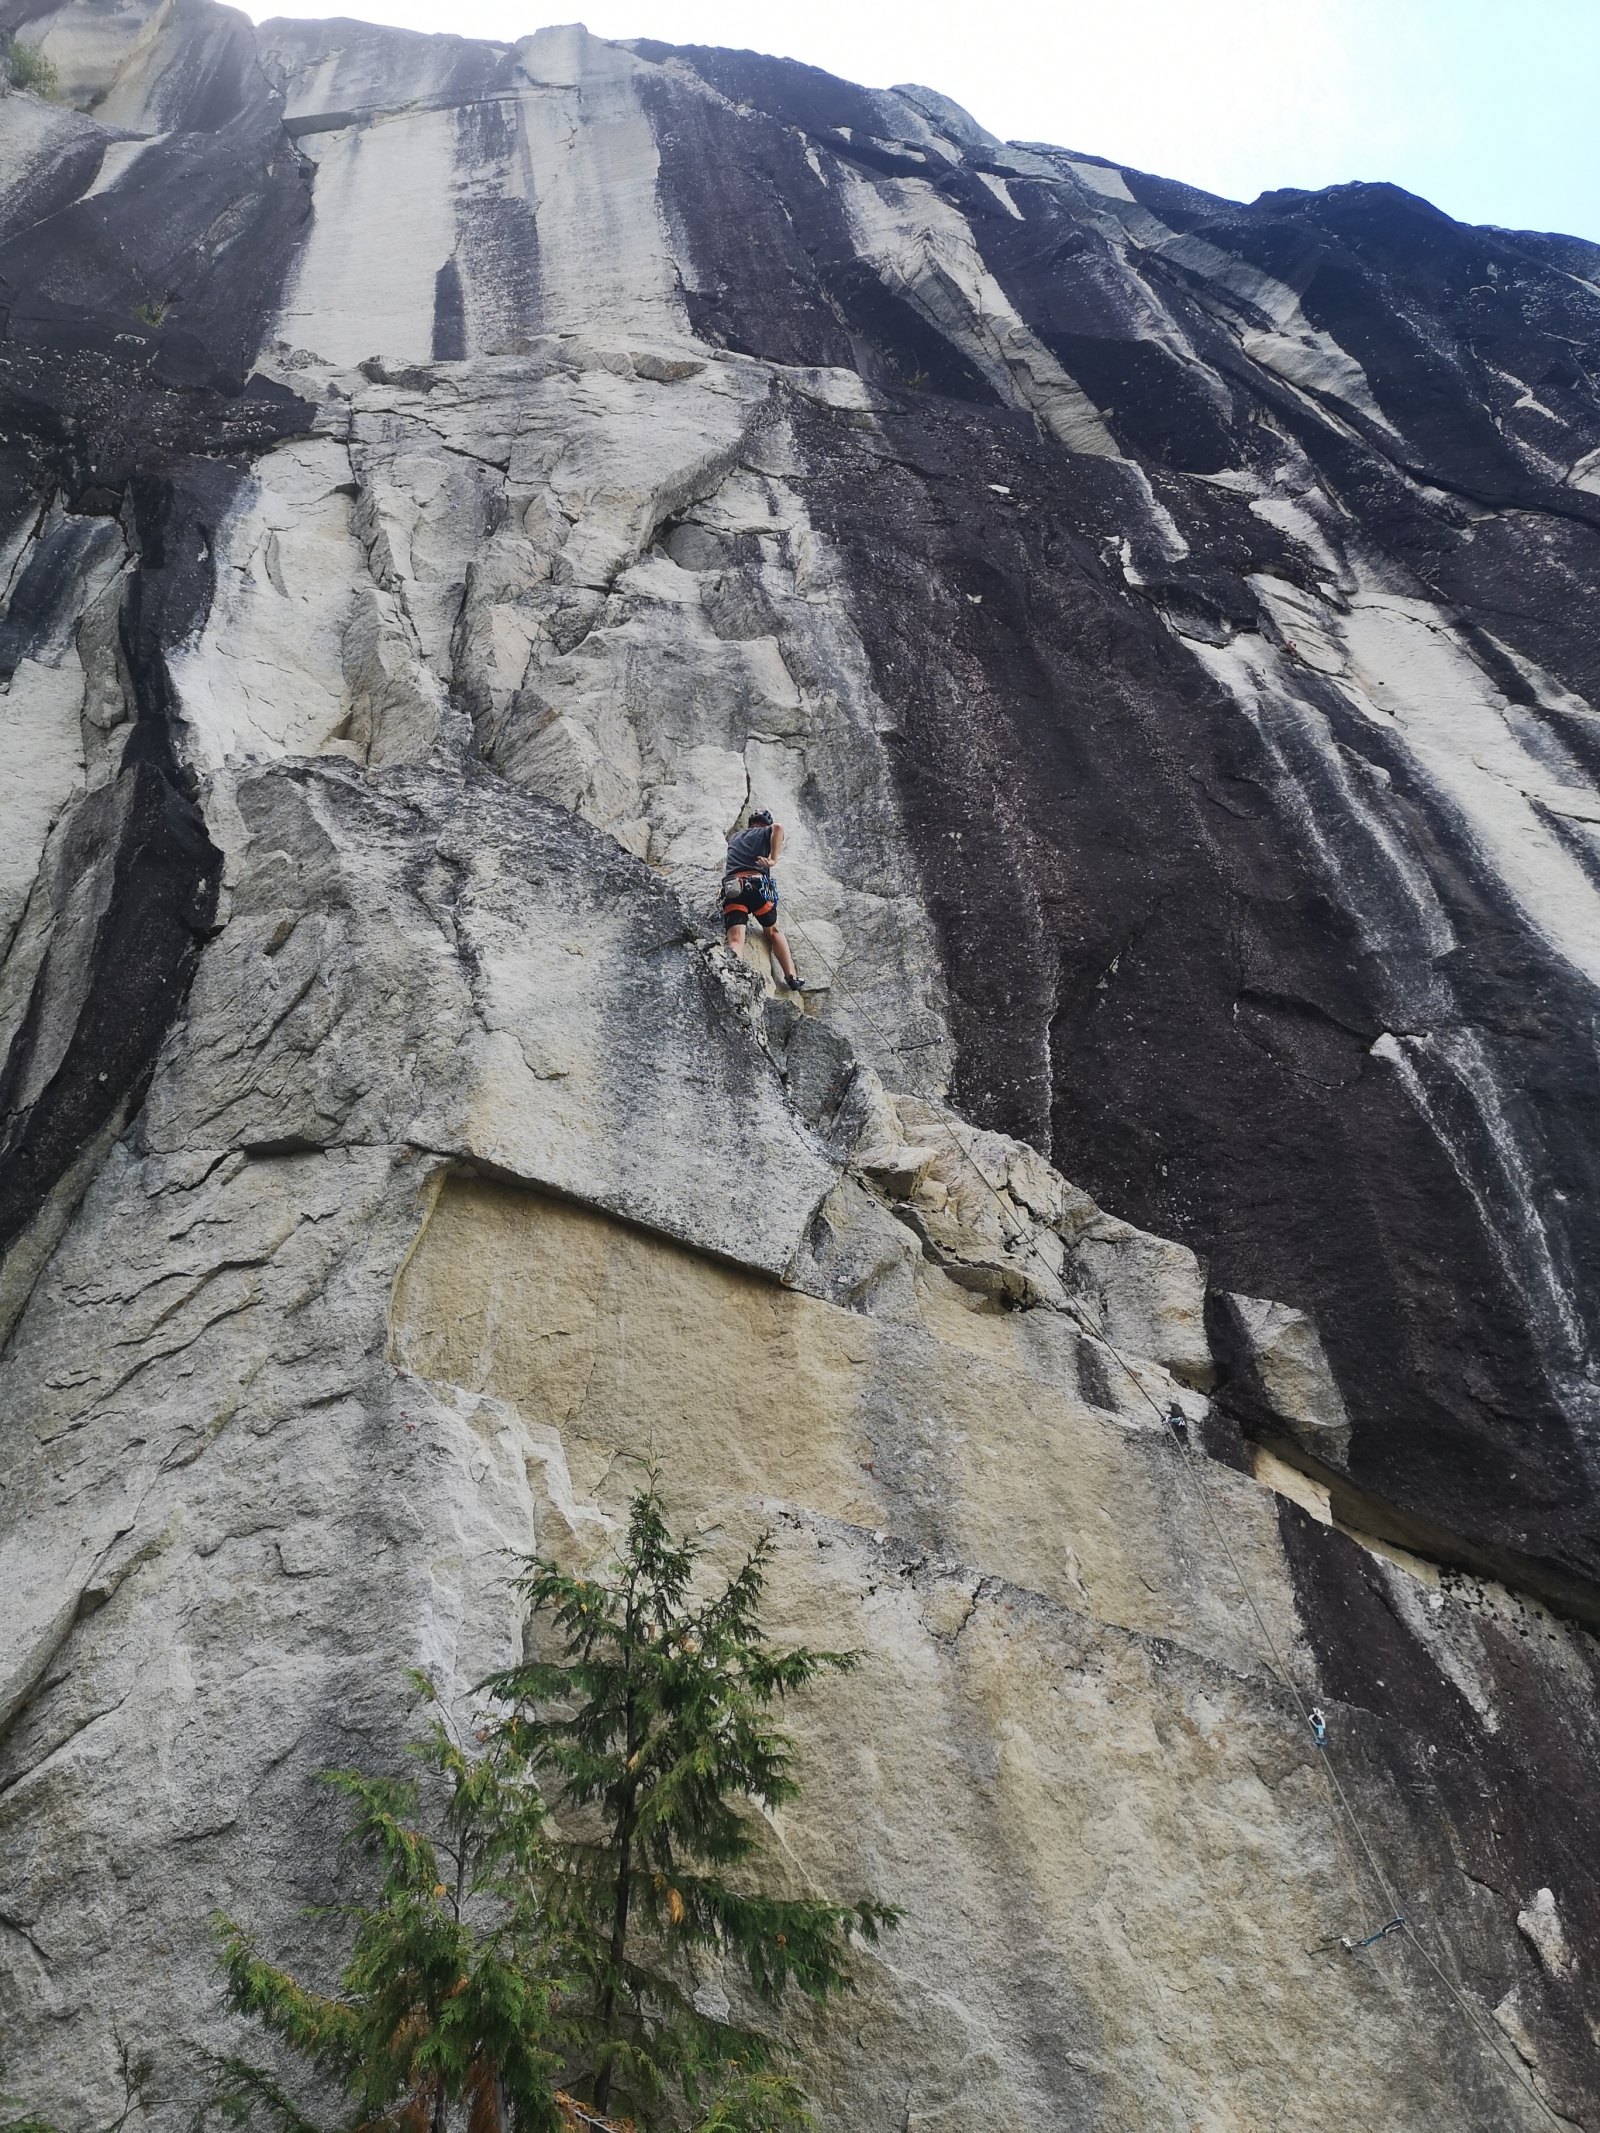
Main Wall (center):
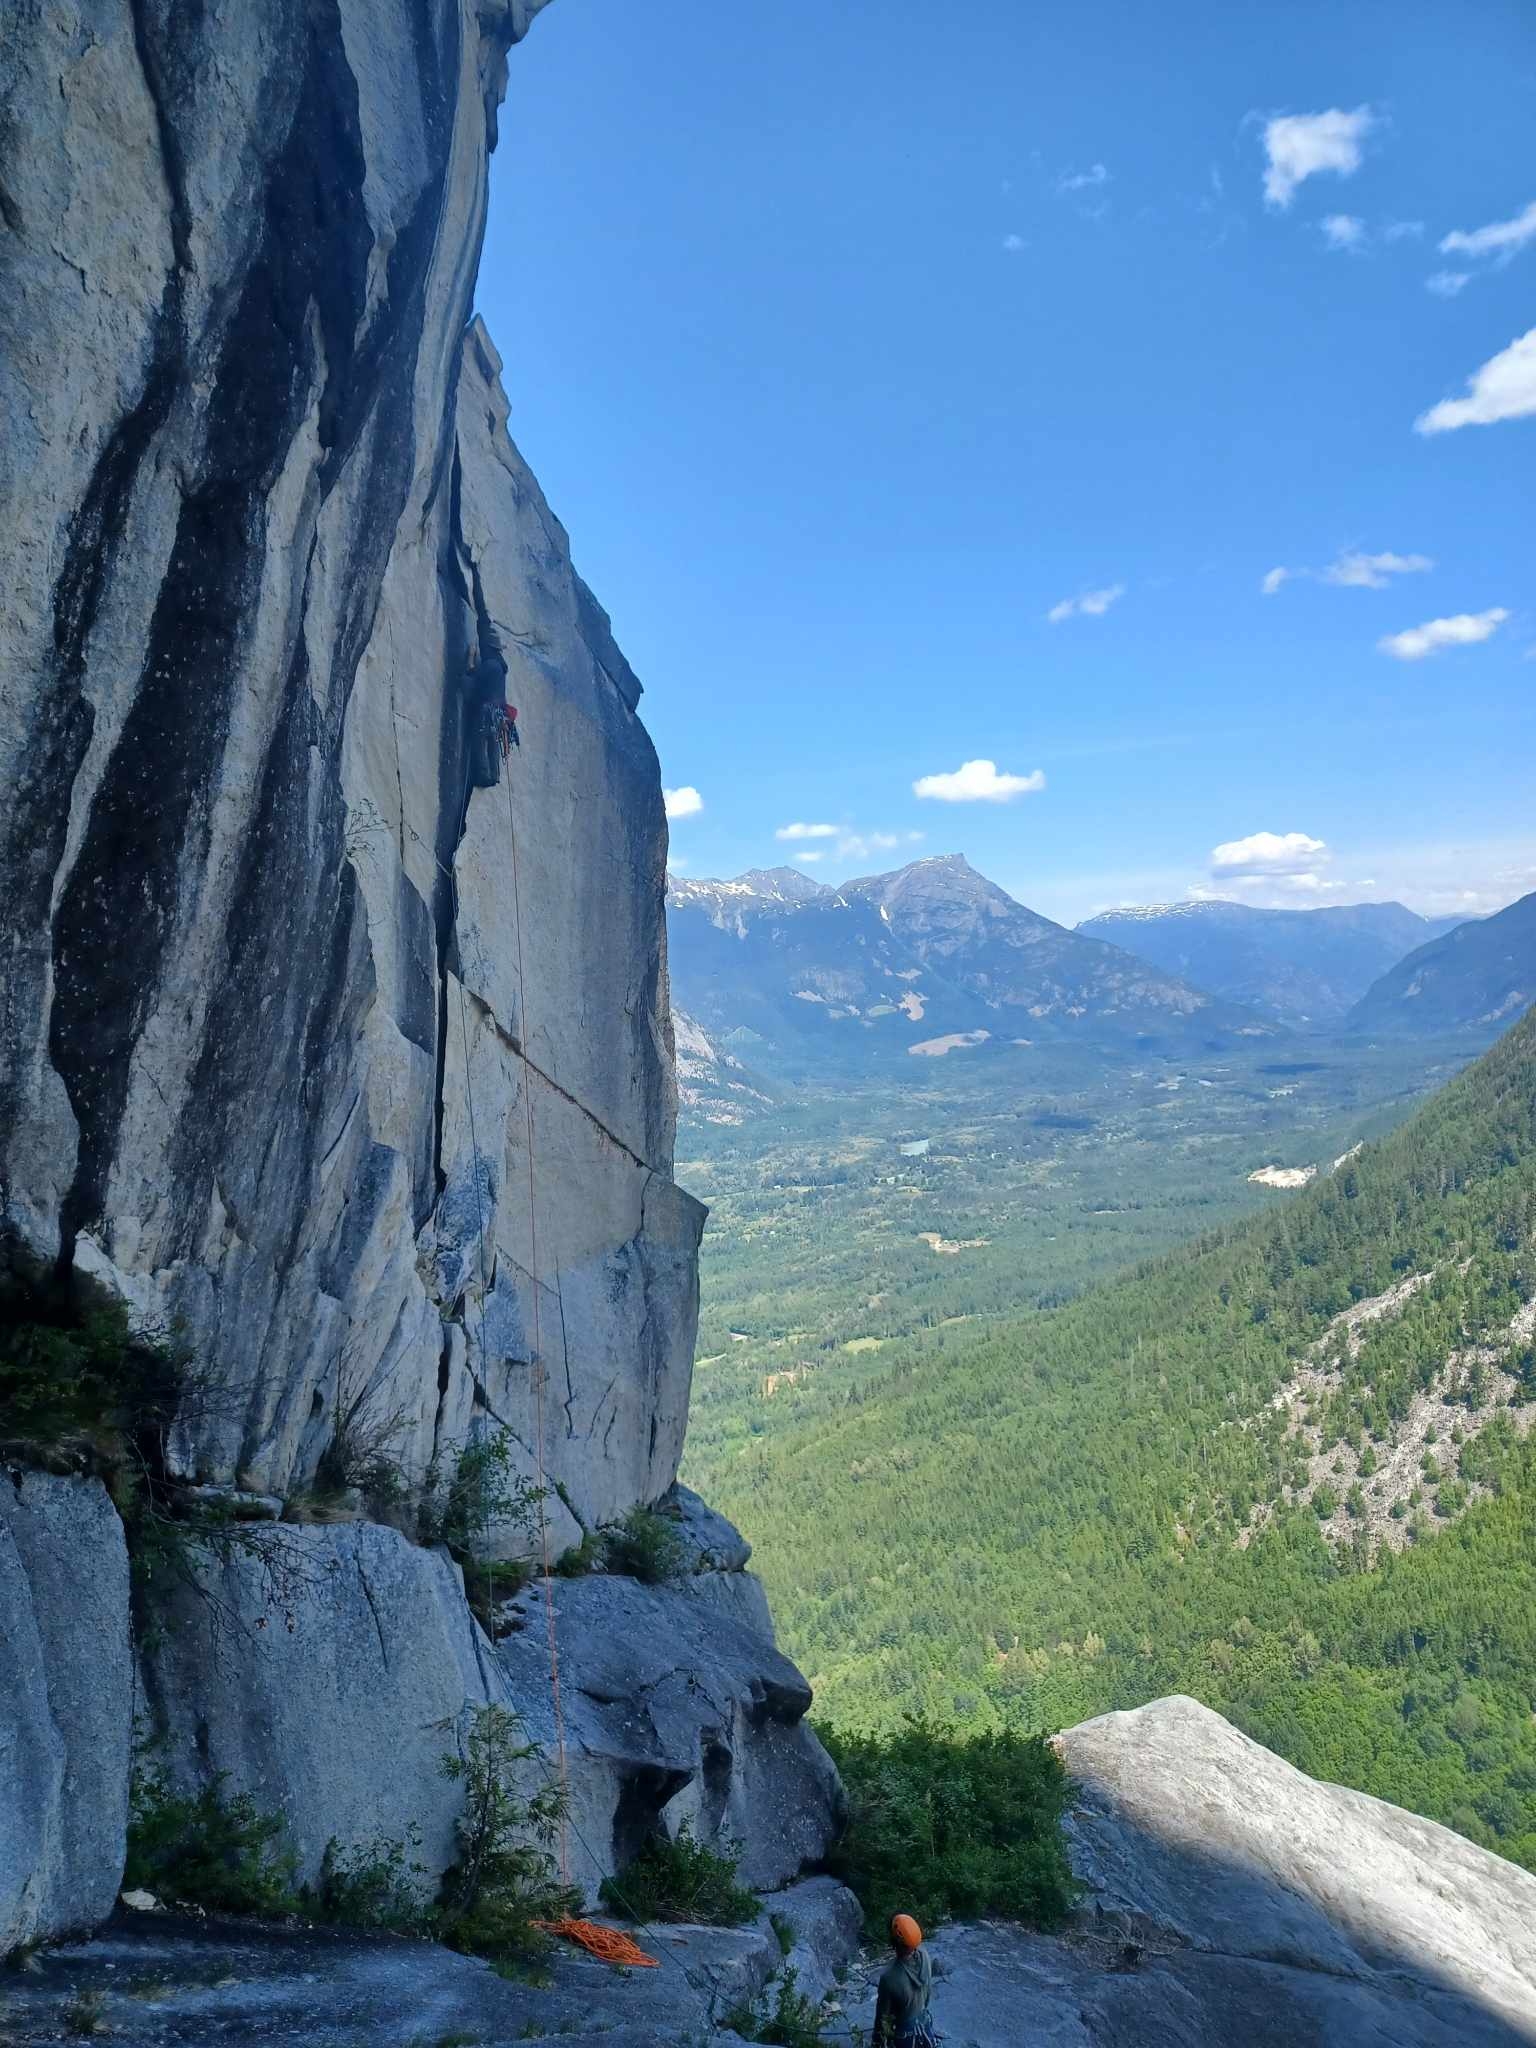
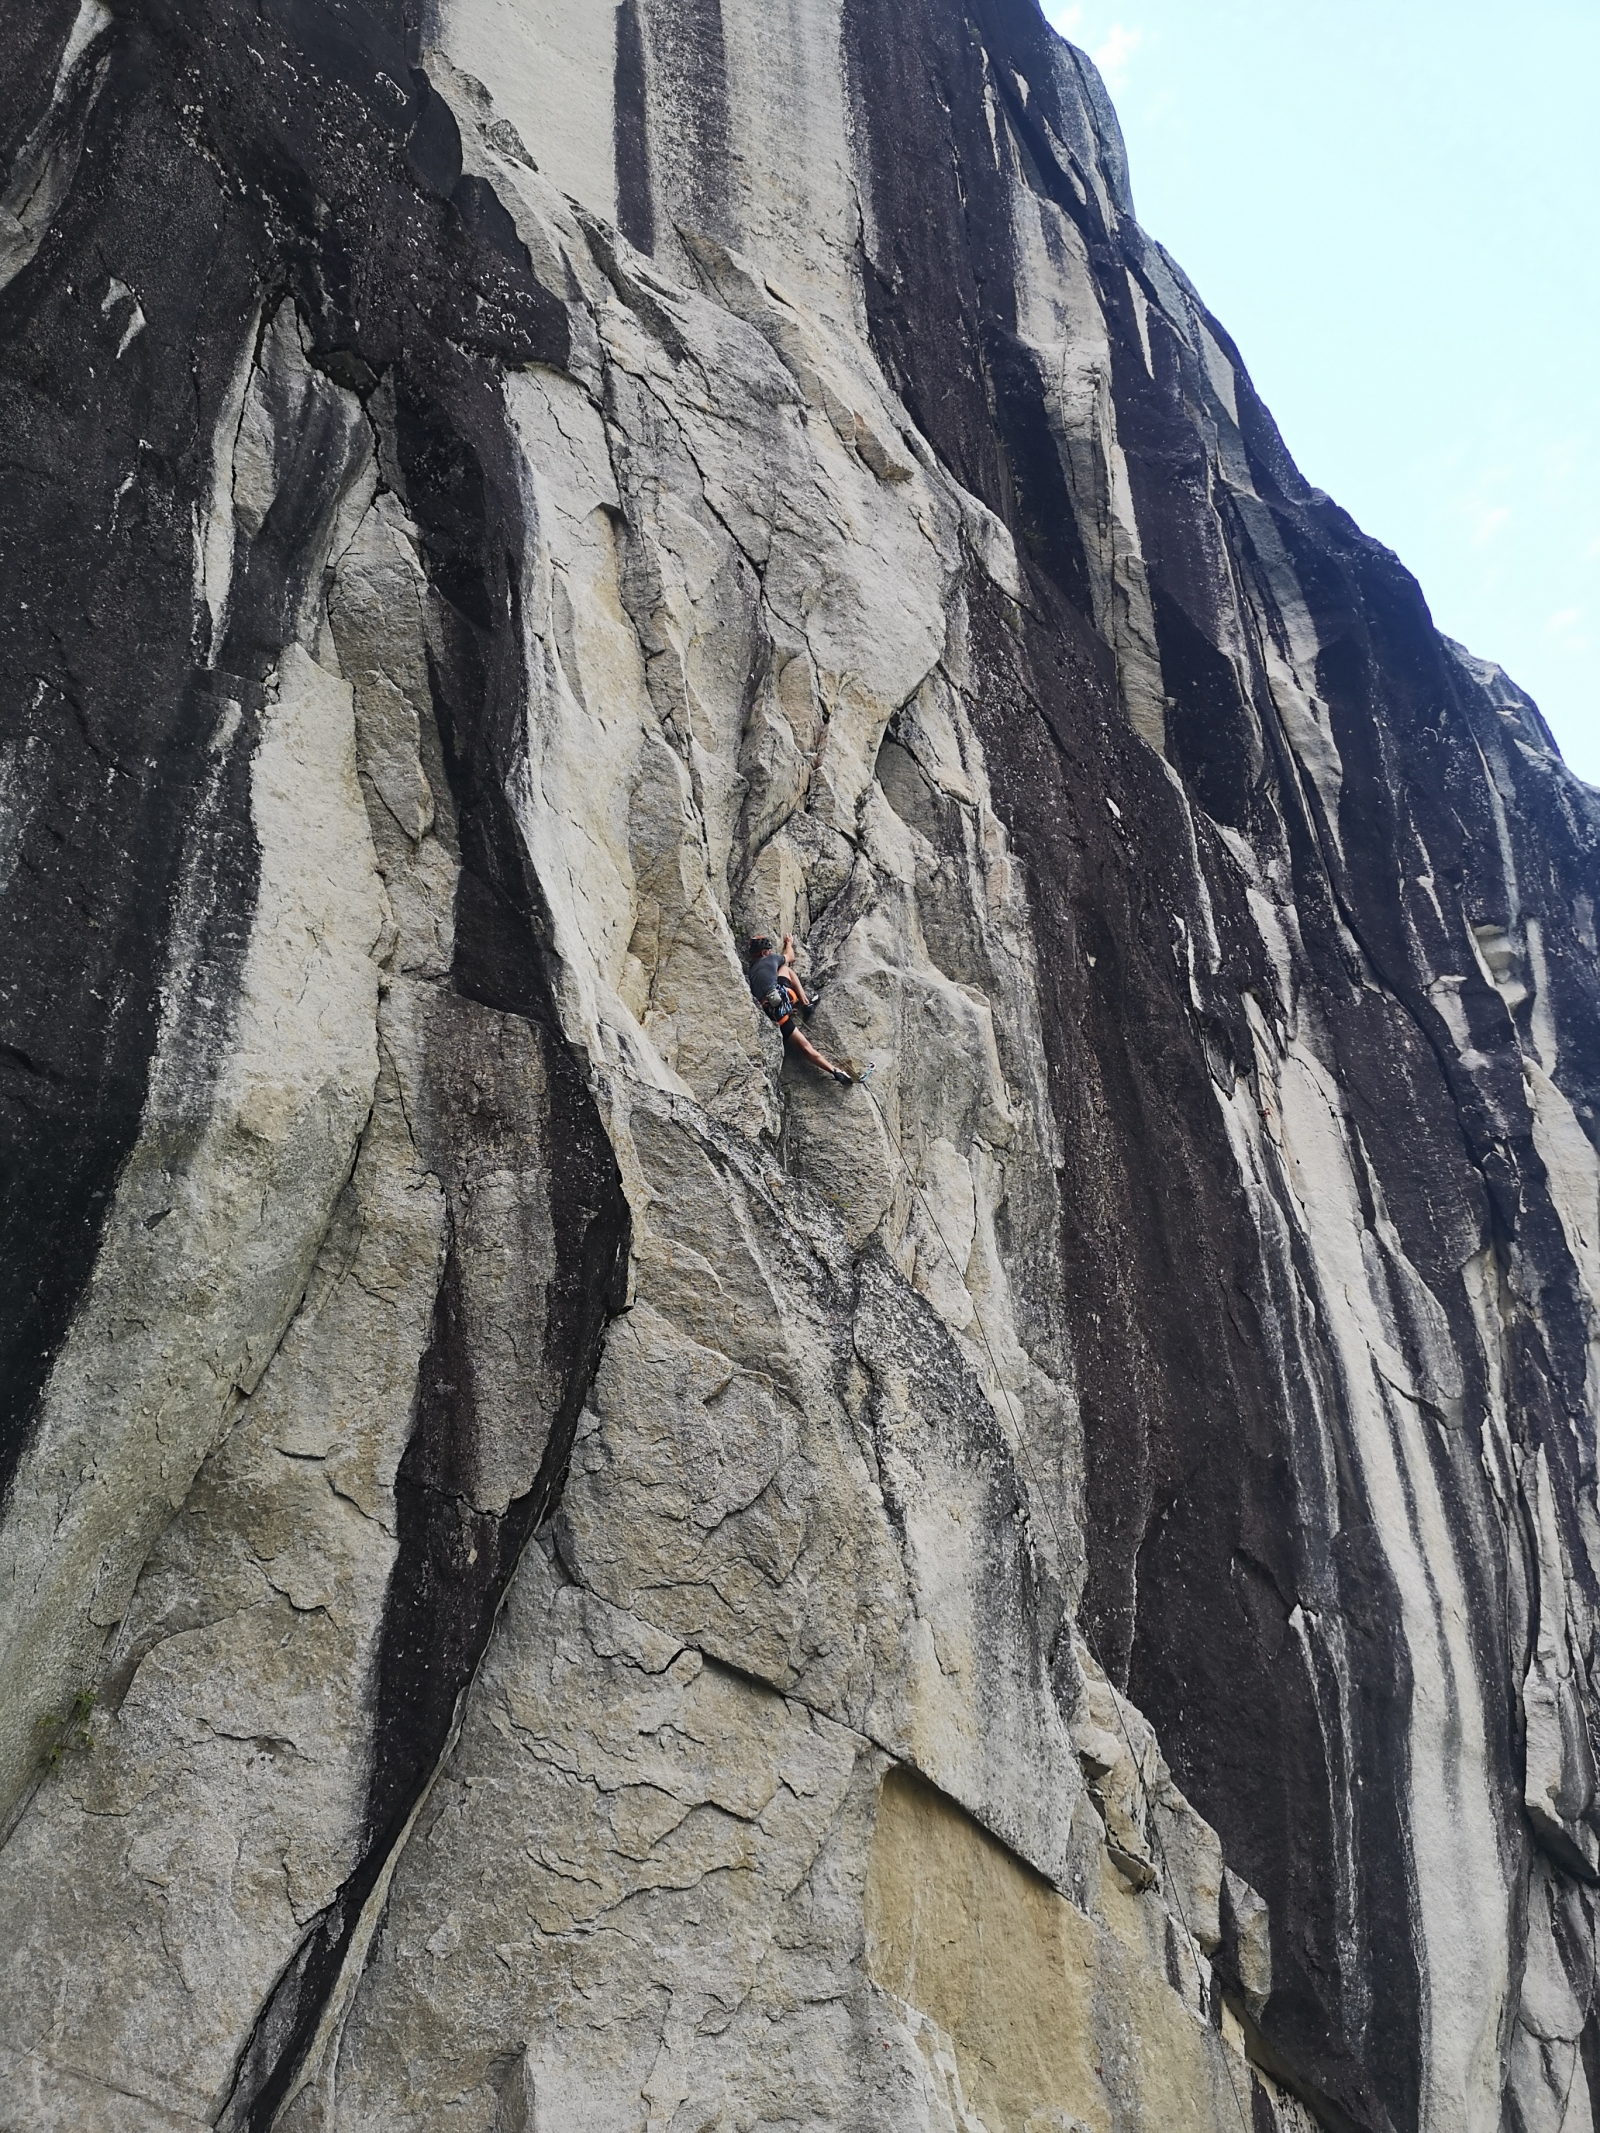
Pina Colada - Pitch 1 - 5.10a: an exciting, short climb up the grand flake at the base of the main North wall. Fun laybacking and pseudo-chimneying up the wide flake to bolted belay station. Single rope can get you up and down. Minimum recommended rack includes 2x #4, 1x #5 Camelot, and a #4 Trango bigbro, plus some smaller sizes for the bottom. Pitch 2 - 5.10 A1: continue up the left-leaning hanging corner, using bolts and gear for aid as necessary. Exit the corner onto a hanging slab, and face climb over steep ground with juggy holds to a final hanging slab. Continue up past some bolts to gear at the final bulge. Easily overcome to belay in an alcove. Pitch 3 - 5.11? A0: Follow bolts past several horizontal ledges, separated by short face problems. Use one of the bolts for aid. Follow the second to last ledge left to final bolts, then final ledge left to belay. Pitch 4 - 5.8: traverse back right on the super-ledge, gently downclimbing a few moves, taking care to place protection for your seconder, to belay at base of rising corner system. FA 2023 Devon Girard, Cole Verrall, Kate McGiverney
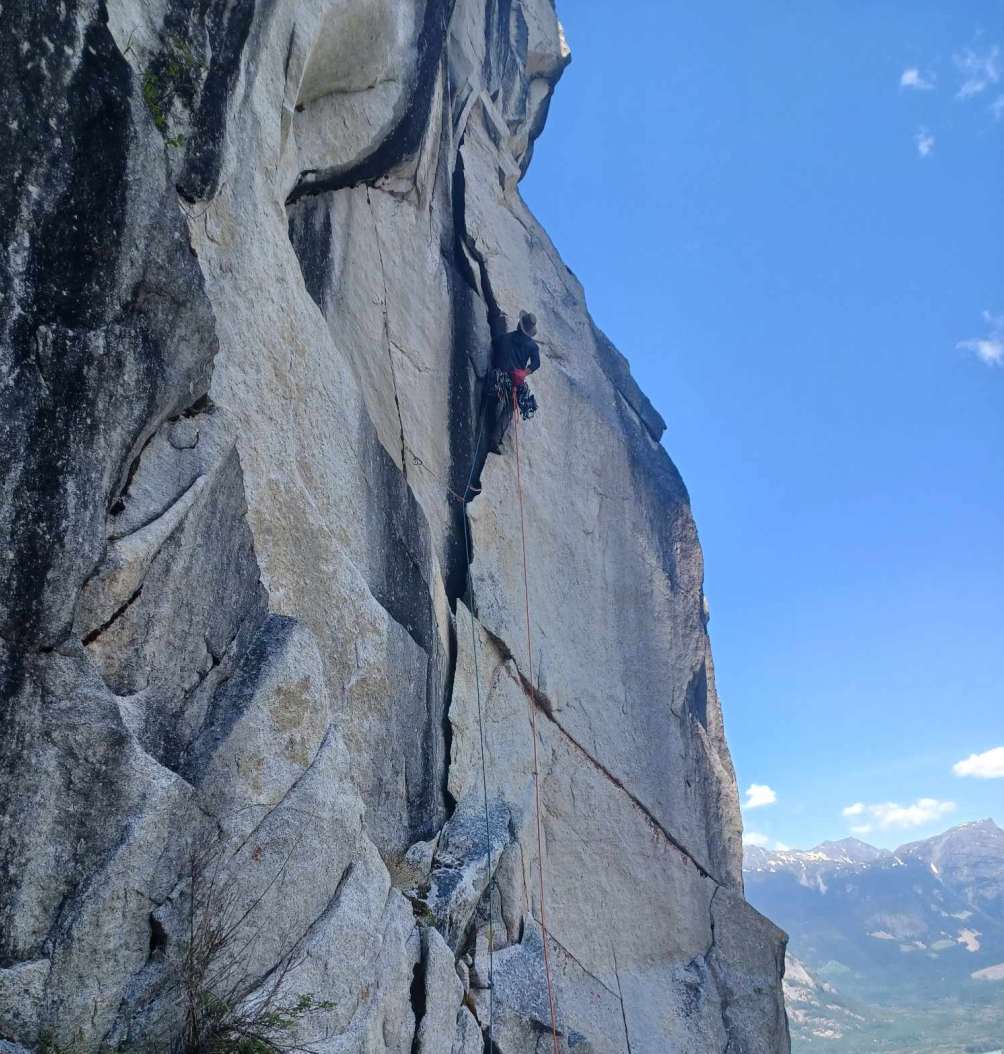
White Rhino - Pitch 1 - 5.12+ 4pa: an epic hand and finger crack arcing across the overhanging main wall. A hard start past good protection leads to a series of bolts up an even harder shut corner. Use the bottom 4 bolts for aid, and the last one for protection - avoiding placing gear behind the looming detached flake. Overcome the juggy flake to small gear in the cracks above. Climb steeply up the crackline with a mix of liebacking and jamming, with good gear pretty much the whole way. Optionally belay at a midstation in a small alcove around 35m, and/or continue up the remainder of the crack. Clip a final bolt and avoid placing gear in the last crack up a detached pillar; a hard off-hands section leads to tight hands for the exit. Mantle the pillar to belay. Option to continue upwards via short 5.8 traverse pitch into 2nd belay of Pina Colada.
Adventures of Smaug - Pitch 1 - 5.12: Fun face climbing up through blocky features with several small cruxes. Clip the 2nd bolt before mantelling onto the first of 3 slopey horizontal ledges. Navigate the ledges leftwards to the base of the crux pillar. Subtle yet powerful sequences unlock the upper pillar; pumpy moves take you to a final traverse and mantel into the belay alcove -15 bolts (FA 2024 Devon Girard). Pitch 2 - 5.11+: Consider using 1st bolt and long-runner to belay as anchor, for better belayer visibility. Delicately move left past the first bolt, slink around the black pillar in wonderfully exposed position, and into the rising flake feature in the white granite bay. Continue stemming up the flake feature, making use of arete features (and hidden crack), past a final bolt (to avoid placing gear in the fragile upper flakes) to saviour jugs. Beware the loose flake! Climb past a small alder and into belay alcove (FA 2025 Clinton Leung, Devon Girard). Pitch 3 - 5.13?: potential 3rd pitch up steep corner crack. Very small gear, very difficult chimney/stem moves. Exit right to belay.
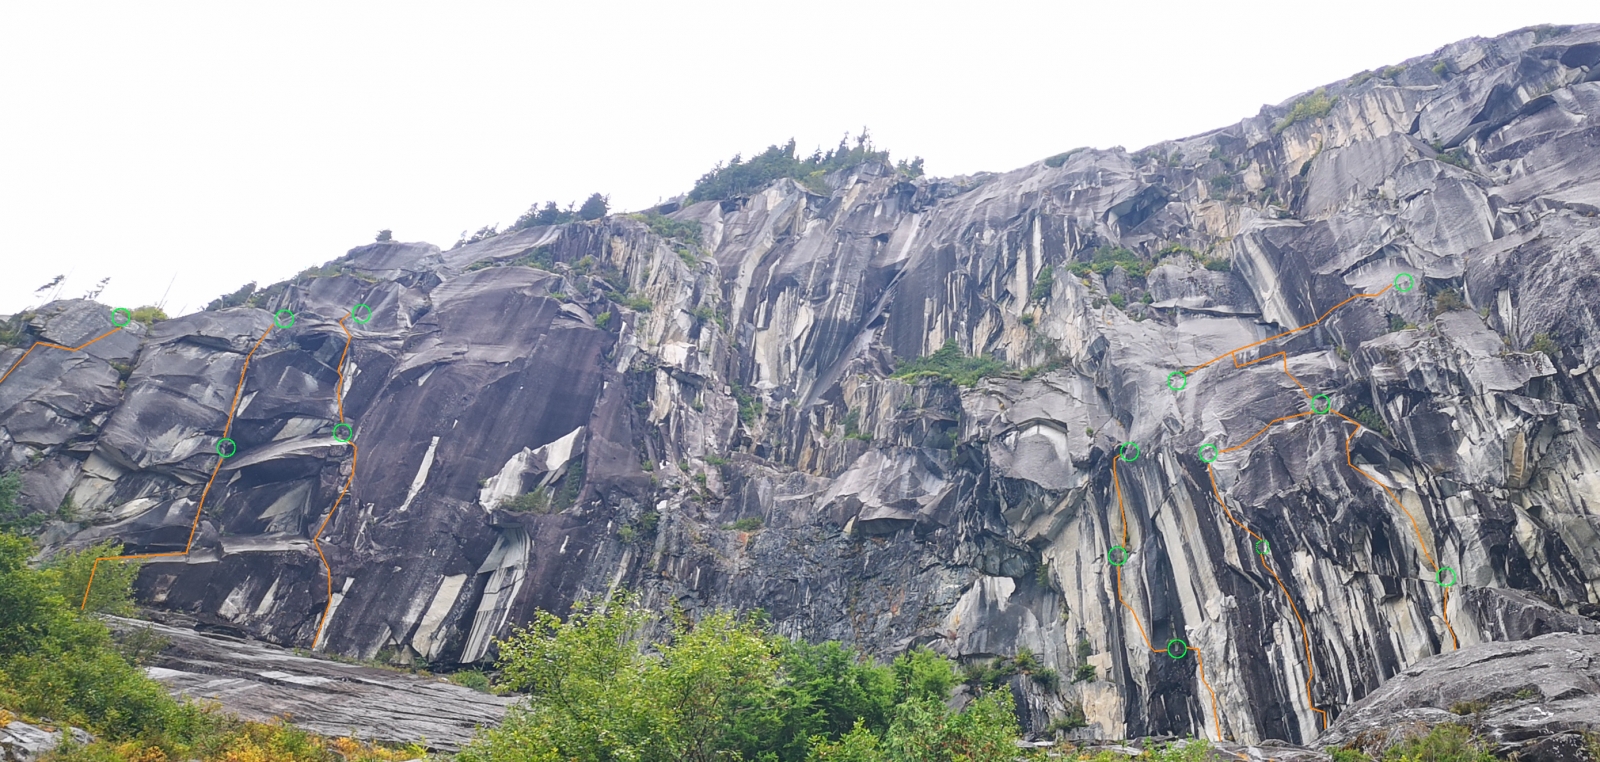
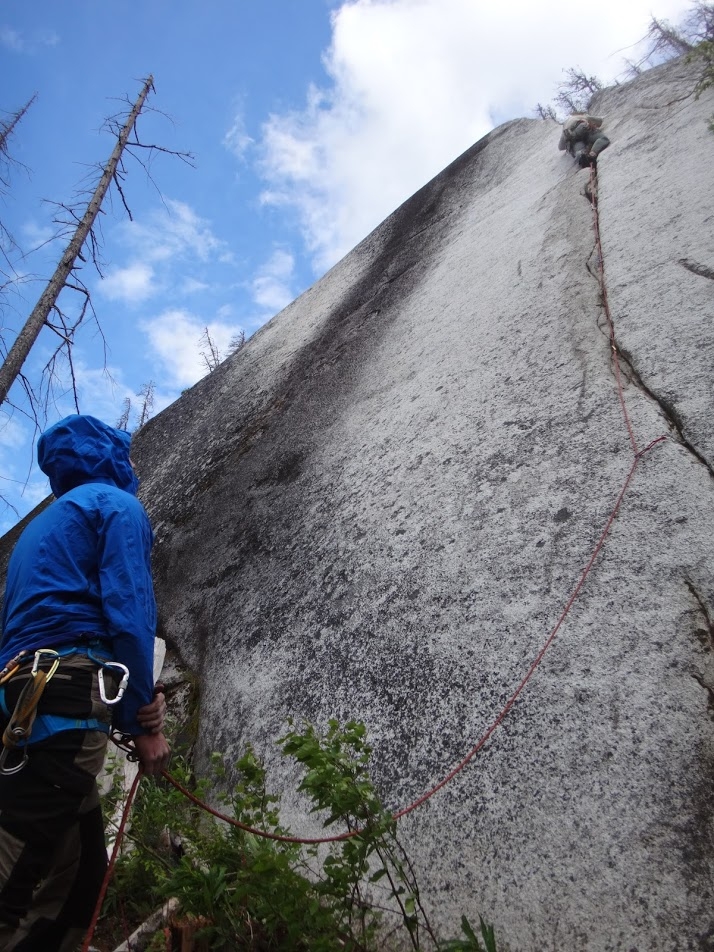
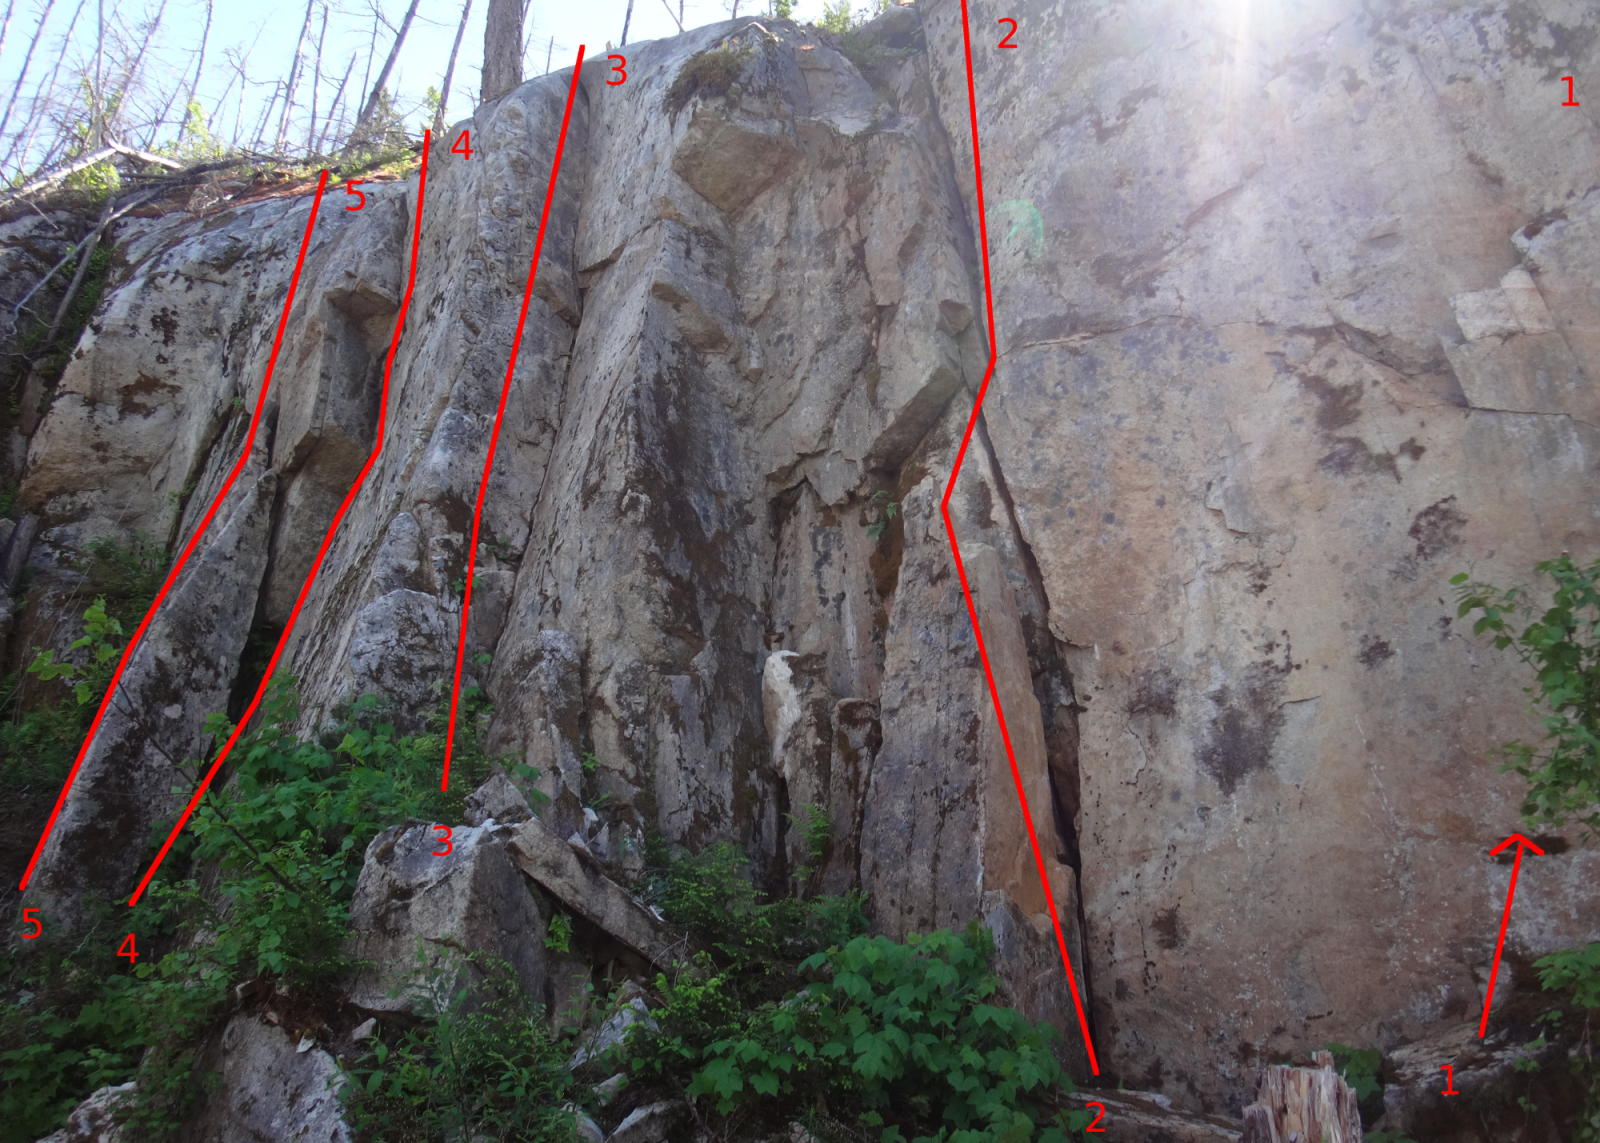
South Wall (left):
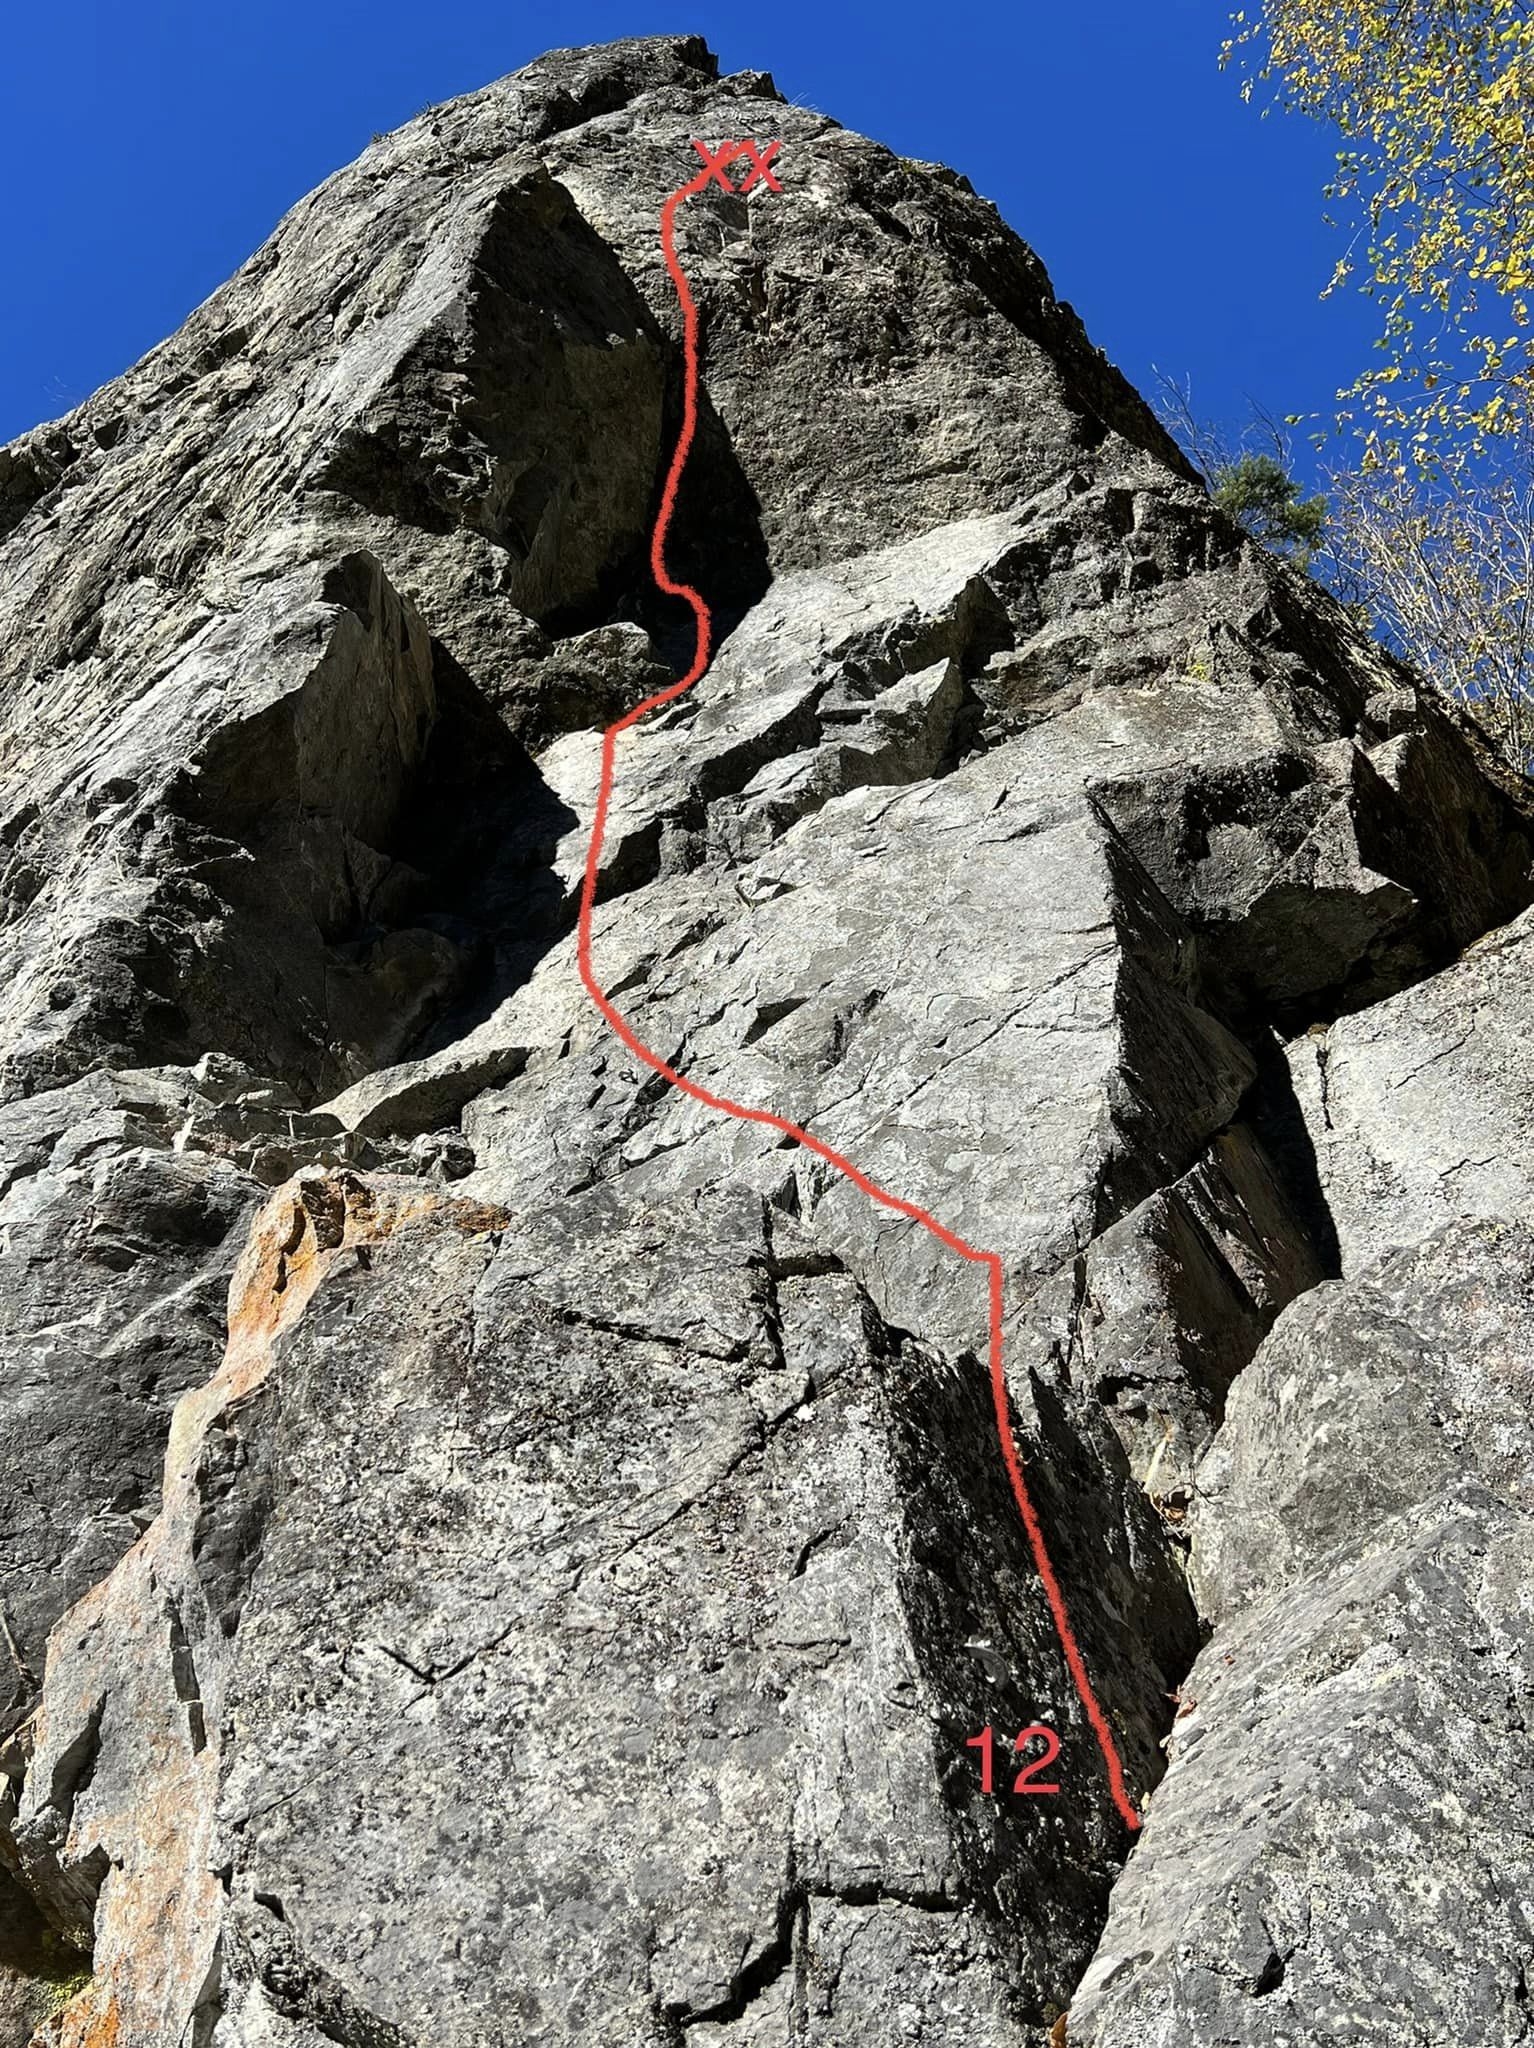
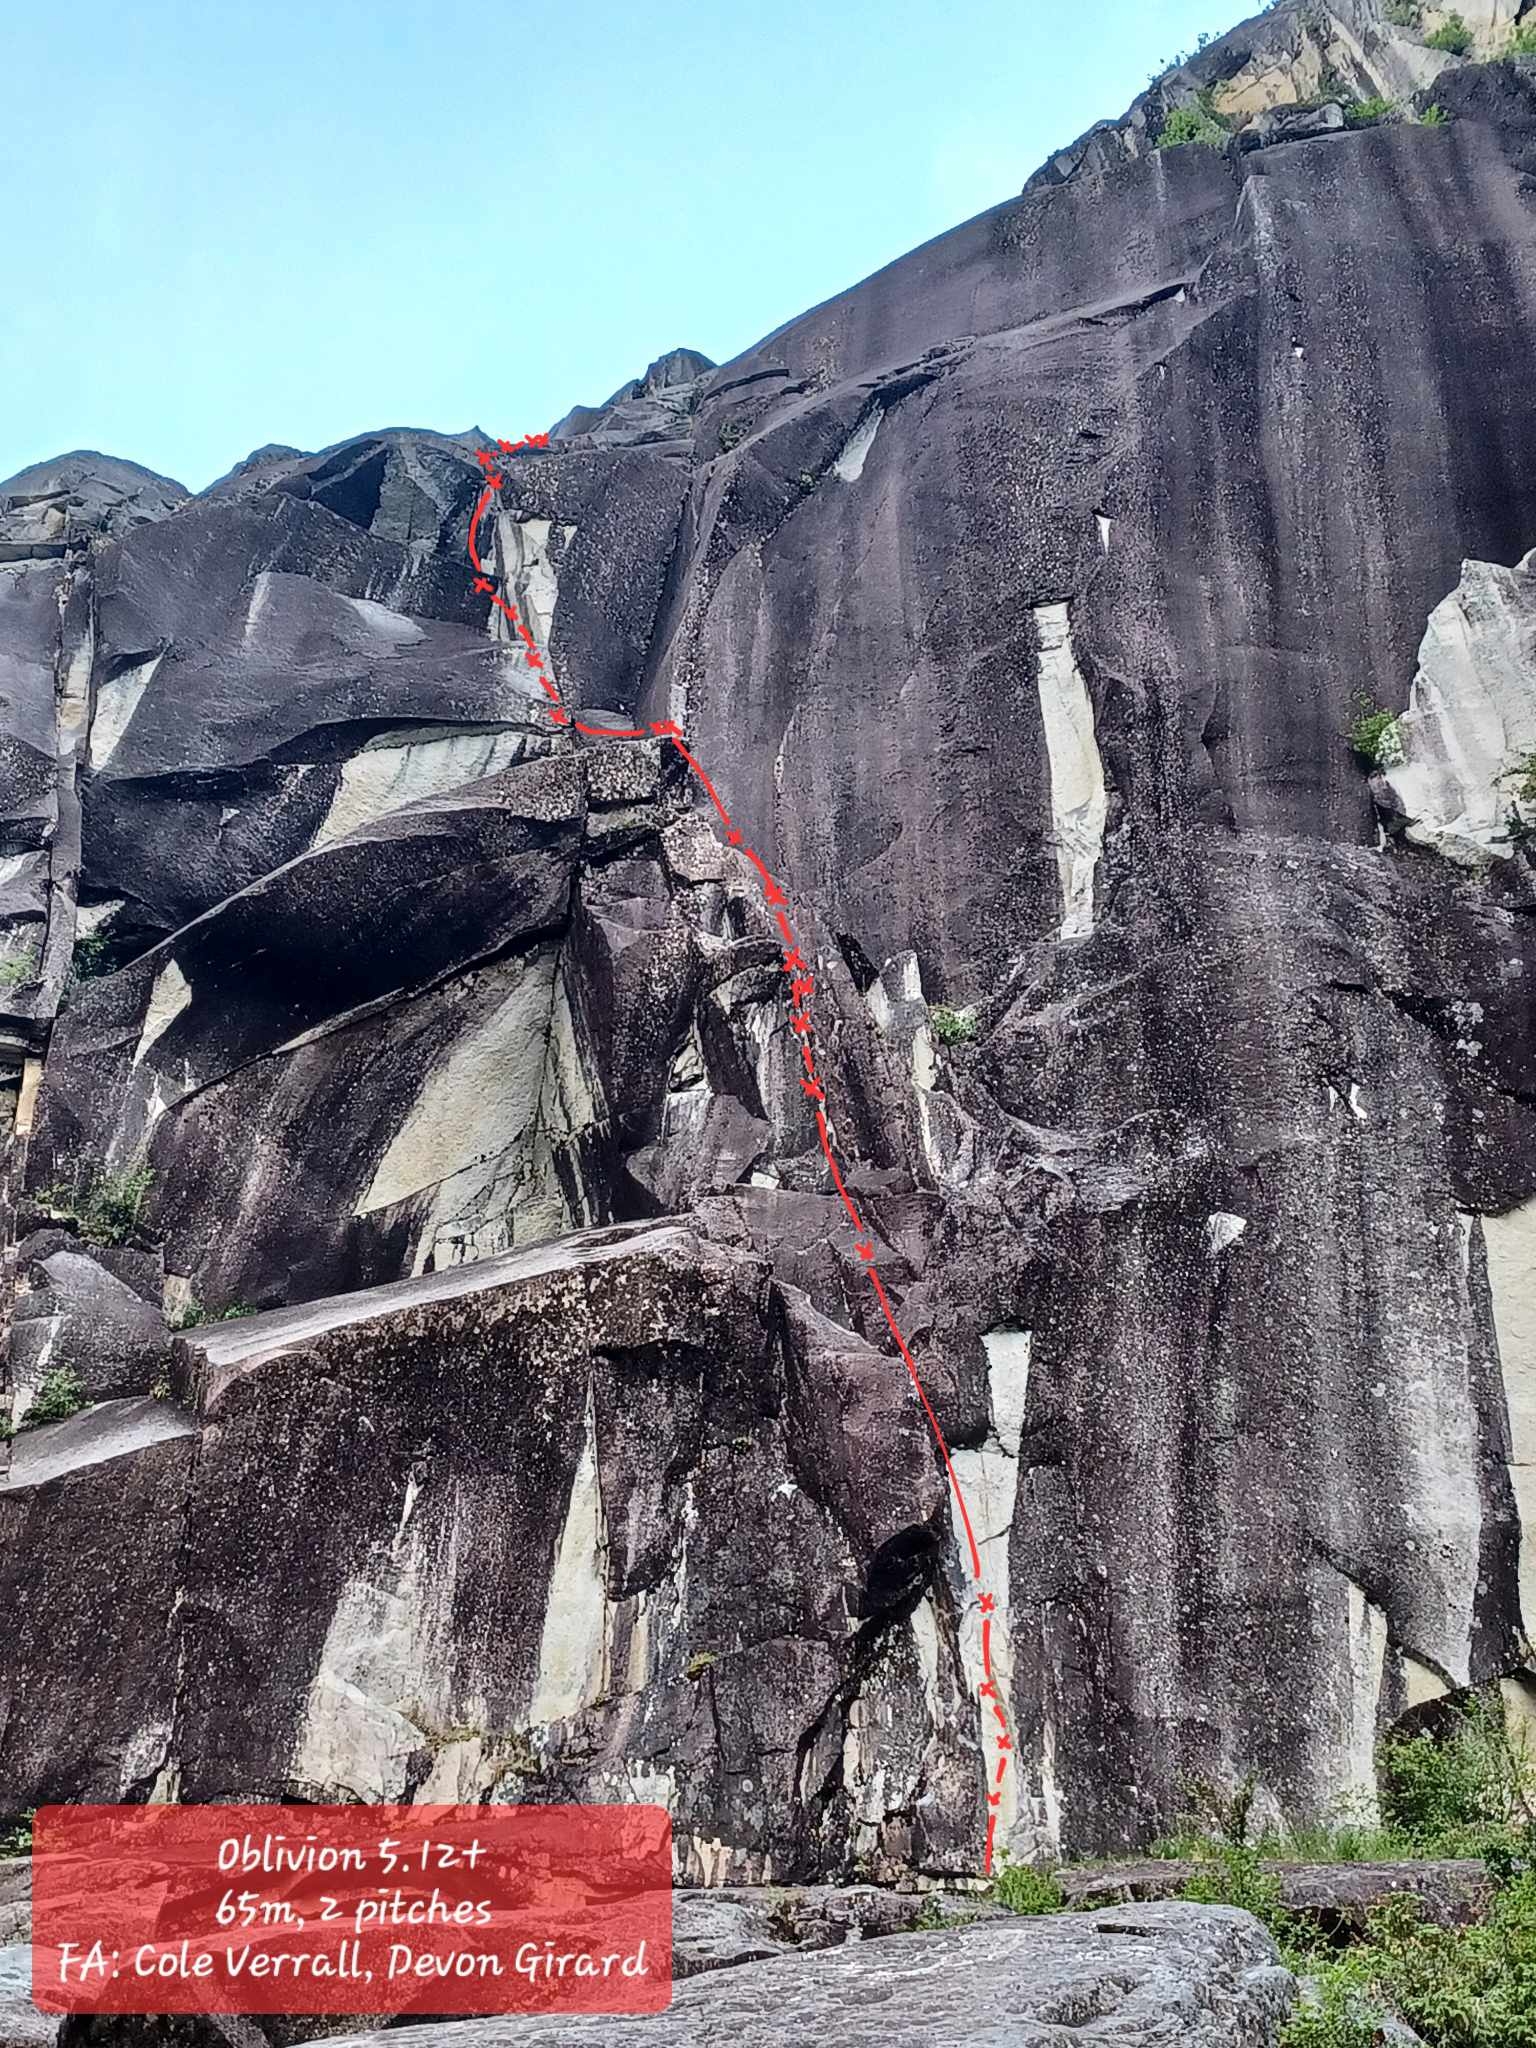
Oblivion - 5.12+, 2 pitches (12++, 11+): hard climbing off the deck past 4 bolts leads to an even harder sequence gaining a small corner with good gear. Climb past positive flakes and face holds as the wall steepens and difficulties increase past 6 more bolts to a belay station on a spacious ledge (5.12+, 35m, 10 bolts + Gear to 2"). Climb through 3 stepped roof features, each with their own challenges, with a mix of bolts and gear. Multiple cruxes with good rests. Unlock the final mantle, followed by an airy step-over to gain an easy corner to anchors (5.11+, 30m, 7 bolts + Gear to 2"). Double ropes required for rappel - 70m single rap to bottom, or midstation can be used to make 60m ropes work. FA 2023 Cole Verrall, Devon Girard
Cat Burglar - 5.12-, 2 pitches (12-, 12-): a few easy (sometimes wet) meters past a bolt, some gear, then another bolt at the low crux, hard layback move to gain a hanging slab. Traverse right with good gear in an immaculate thin crack at the top of the hanging slab, to gain the defining double-crack column that runs the height of the whole route. Problem-solve your way up the elevator-shaft feature, delicately using a loose-but-well-jammed block or two, passing 1 more bolt before a roof feature, good gear and jams take you to the first belay on top of a detached pillar (11+). Continue up the double-crack feature with good gear, jamming, laybacking and chimneying. Solve the midway crux with finesse and burl, continue past a small roof to some easier terrain, until the high crux overcoming the final flake (save a yellow TCU for this bit) - a sting in the tail requiring some strength held in reserve (12-). Double rack to 2", triple #0/purple metolious, quadruples of #1/blue metolious. Double ropes to rap, about 65 meters, a 70m rope gets you down in one rap. FA 2023 Devon Girard, Cole Verrall
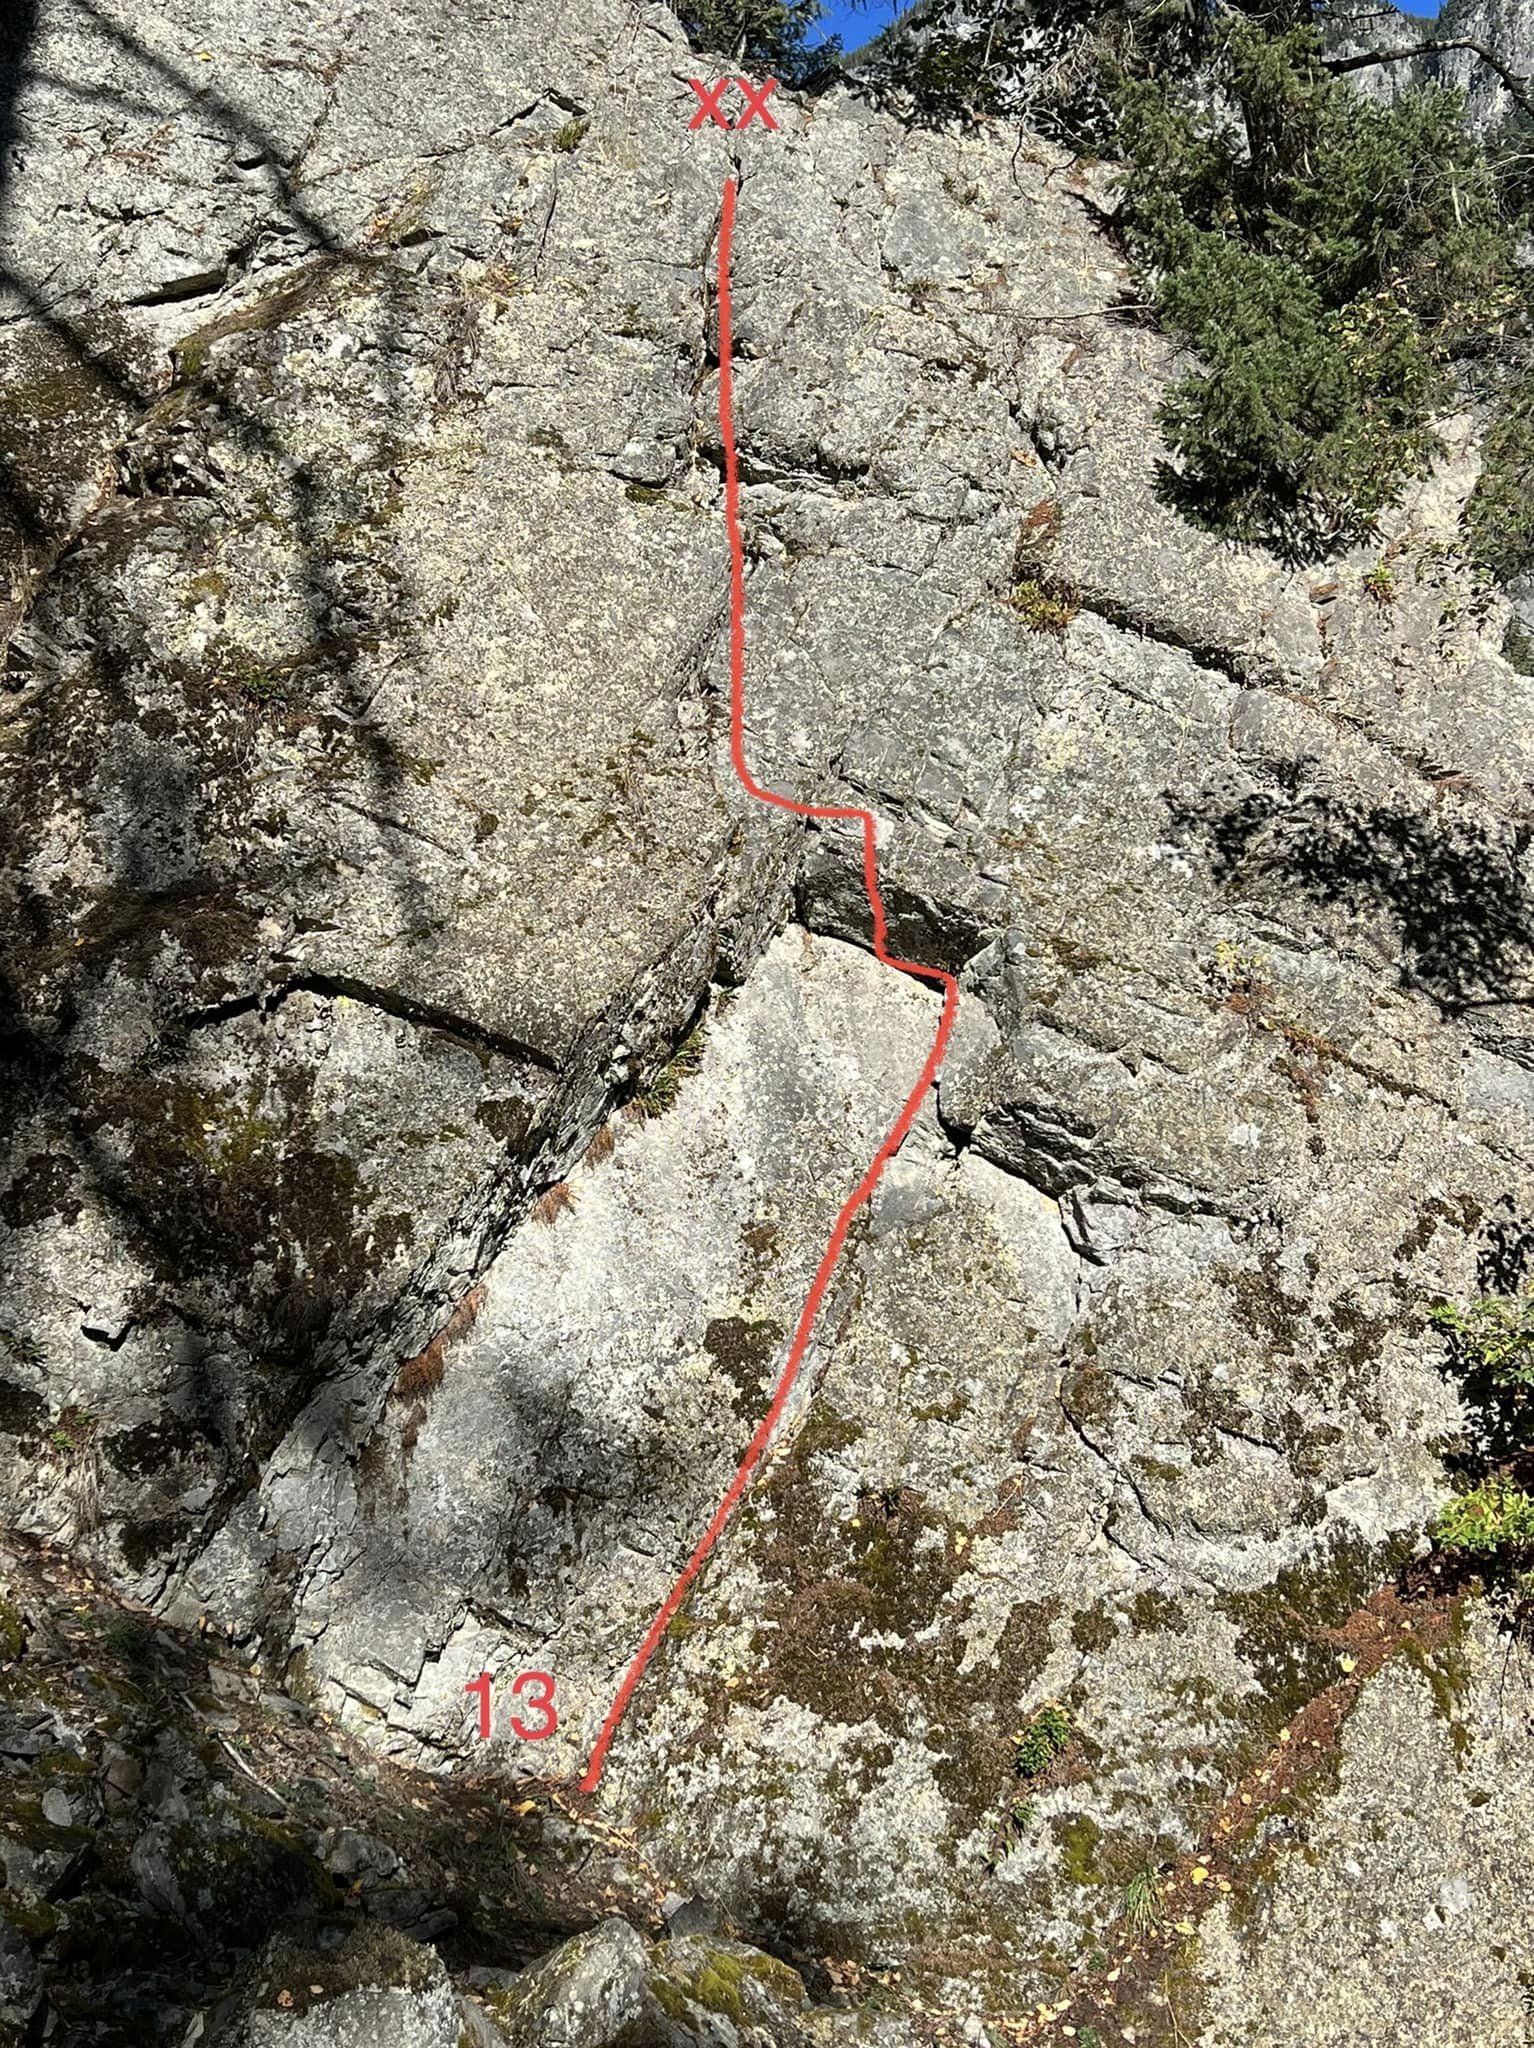
Silk Worm - 5.11+, single 60m pitch: Starting at the far left of the South walls, climb discontinuous features and varied gear to the base of a clean and shallow corner. Stem, bridge, scoot, and levitate up the corner feature, with good small gear at the back. Climb past the corner feature to gain a shallow ledge; walk right (note the gear by feet) and gain an exit flake splitting a short, exposed headwall. Exciting moves to the end. Many small cams!